

Peugeot 306 Maxi & Evo2 - WIP


Коментари
42 5 December 2024, 22:19
i will seat behind Martin then 😄
i would have never thought of bending stuff in the dishwasher, good idea!
6 December 2024, 13:03


"If there's trouble from the beginning like this, there are often troubles throughout the work,..."
Well, one way to look at it. I'd rather say: whatever problem might come along, you will find a way to fix it.
I am in for the ride.
6 December 2024, 22:07
Thanks Michael. Another trouble has occurred again. but your words are encouraging. I'll try to finish it this year if possible. 😄
7 December 2024, 13:26
@Denis Dogadov - Because I want to have both versions.
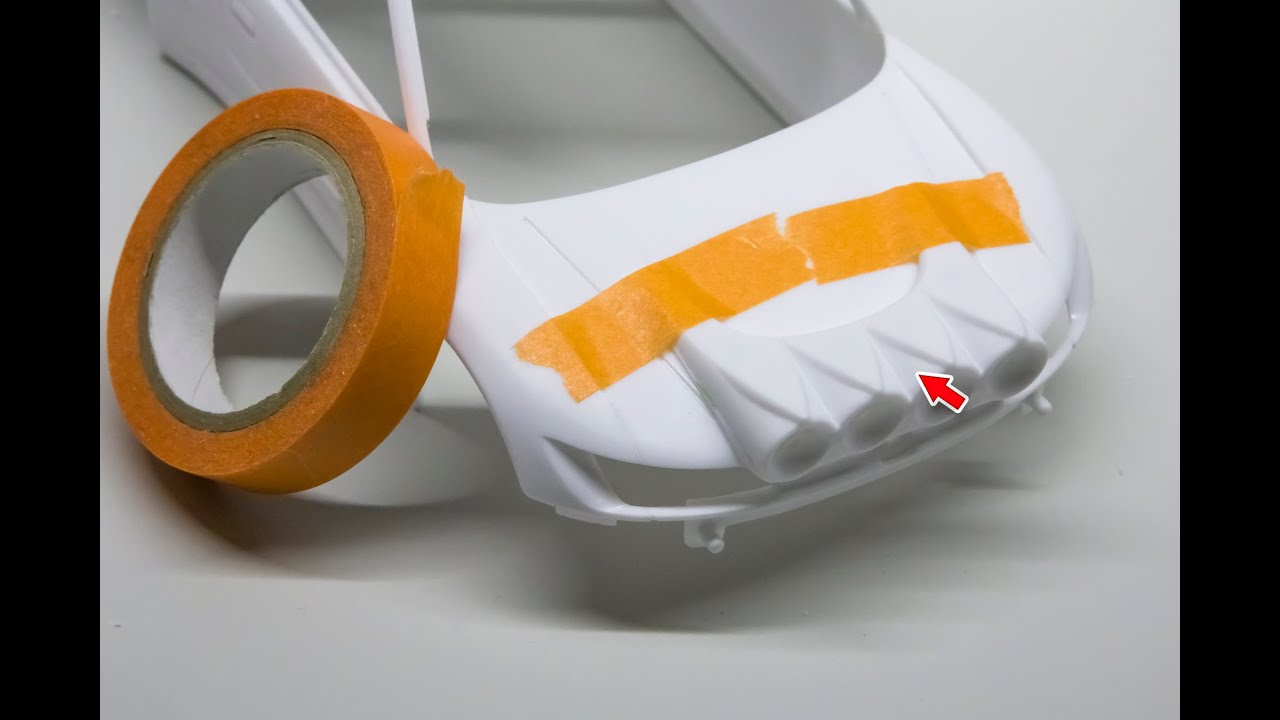
0:54, 13:55 Attached Ext light.
Youtube Video
1 9 December 2024, 15:47
The problem is that this removable unit will scratch the paint on the hood every time you take it off, a bad idea.
9 December 2024, 15:51
motorart.tistory.com/465
Oh, I've used magnets occasionally, but I've never scratched it yet. Thank you for your advise. 😉
9 December 2024, 15:58
It looks like you went too wet on the white. A shame as you were progressing so quickly
9 December 2024, 16:04
Best of luck lad. on behalf of all of scalemates, we believe in you!
18 January 2025, 21:39
Hang on, almost there! 👍 There are pains only car modelers can comprehend....😄
18 January 2025, 21:43
holy molly, i have a dejavu when one of my models started to crumble in from of me.... scary as hell.... i feel your pain 🙁
well, if you can not fix it.... maybe you can weather the crap out of it?.... those are rally cars after all.....
21 January 2025, 23:09
Only Loctite 401, which has a slightly higher viscosity, showed this phenomenon, while adhesives with lower viscosity were fine.
22 January 2025, 05:13
I feel for you too. That hurts. I cross my fingers that you come up with a solution that will satisfy you.
22 January 2025, 08:47
I have actually become so paranoid of ruining something that I rarely use super glue when doing final assembly. Just 2K or UV glue. Something you can wipe off if you mess up, unlike Cyanacrylate.
22 January 2025, 09:07
I hope you're not too traumatised by this journey.
You did a magnificent job saving from all the traps laid out.
22 January 2025, 19:27
Oh thank the modling gods! Bravo, hats off for the patience and endurance. Fantastic result! 👍👍
22 January 2025, 19:43
huge amount of patience and perseverance certainly paid off, they look really good!
22 January 2025, 22:22


