


Dornier Do 24 SAR Project
 1May 24, 2023Kit's cockpit is very simple but enough if you do not want to detail more (only includes the floor, the bulkhead that divides the cabin with the radio compartment, seats, controls and dashboard. Almost all with hardly any details). Therefore, I decide to detail it more based on photos of other modelers and real photos in B/W from the time and from museums.
 2June 13, 2017Trying to improve the cockpit.
 3June 13, 2017Building the radio compartment from scratch, behind the cockpit.
 4June 13, 2017Building the radio compartment from scratch, behind the cockpit.
 5June 13, 2017More details in the radio compartment. Panels, cables, pipes...
 6June 13, 2017Adding details in the seats and cockpit's floor.
 7June 13, 2017Finishing the cockpit and adding details on the side walls.
 8June 13, 2017Checking fits and viewing results.
 9June 13, 2017Checking fits and viewing results.
 10June 13, 2017Details on the side walls of the radio compartment and other elements.
 11June 13, 2017Details on the side walls of the radio compartment and other elements.
 12May 24, 2023The midships gun from within the Do-24K-1, the gunner had to do with a simple belt to sit on. On the right is there a bilge pump or maybe an current generator?
 13June 13, 2017Trying to do something like that bilge pump or generator.
 14June 13, 2017Set in place.
 15June 13, 2017Also doing something similar to the cabinets in pic 12. Possibly not see through the central turret, but maybe you can see something.
 16June 13, 2017The other side of same compartment.
 17June 13, 2017It seems that almost everything is already in place, ready to paint. The central part corresponds to the bunk beds and other elements, but absolutely nothing will be seen through those small windows, so I will not add any details in that area.
 18June 16, 2017A knowledgeable modeler explained very interesting things to me, and among them he told me that some of these Spanish Dorniers were painted on the inside with a kind of bottle green, so this one could have been painted like that or a similar green.
 19June 16, 2017Checking results and fits.
 20June 16, 2017A knowledgeable modeler explained very interesting things to me, and among them he told me that some of these Spanish Dorniers were painted on the inside with a kind of bottle green, so this one could have been painted like that or a similar green.
 21June 16, 2017A knowledgeable modeler explained very interesting things to me, and among them he told me that some of these Spanish Dorniers were painted on the inside with a kind of bottle green, so this one could have been painted like that or a similar green.
 22June 16, 2017Before applying oils I do some wear on the floor, etc...
 23June 16, 2017Before applying oils I make some wear on the floor, etc...
 24June 16, 2017Before closing the fuselage, I'll finish with some details, such as the cockpit bulkhead glass, made with thick acetate taken from a blister pack (which the model doesn't have).
 25June 16, 2017Add to the operator radio's table a headphones with its cable made from scratch
 26June 16, 2017Improving the appearance of the seats with oil paintings and adding the handmade belts.
 27June 16, 2017Viewing the result.
 28June 16, 2017Adding a Bay Pollensa's map to the operator radio's table.
 29June 16, 2017Viewing the result.
 30June 16, 2017Viewing the result and masking the windows.
 31June 16, 2017Viewing the result.
 32June 16, 2017Closed fuselage.
 33June 16, 2017Closed fuselage, cover the gaps of the front and rear turrets, place the central turret already painted and preparing the engines.
 34June 23, 2017Fine rigid green painted copper wire to detail the engines.
 35June 23, 2017Detailed engines.
 36December 2, 2017Engines inserted in their fairings. Oils applied.
 37December 2, 2017Intrados, painted with Lara's aluminium/silver.
 38December 2, 2017Installing the floats, drifts and cockpit glass.
 39December 2, 2017The fit of the cockpit's transparent part with the fuselage was not entirely good. It was a little baggy on the sides (there is one step left at the bottom). Using white glue diluted with a little water in layers (allowing it to dry between layers). I prefer to use this method rather than putty and sand risking the clear part. Excess white glue is removed with a damp brush.
 40December 2, 2017White glue once dry, after applying several layers.
 41December 2, 2017This strip (I think is for the crew pass) is included in the latest Italeri tool by means of photo-etched parts. I have tried to reproduce here it because this also saves sanding the upper seam of the fuselage joint as it is covered with this strip.
 42December 2, 2017Also reproducing the small strip of the nose part. Puttying the joints of the floats with the fuselage with Vallejo's plastic putty.
 43December 2, 2017Putting tail stabilizers in place.
 44January 25, 2018The glue itself was not enough to fill the wing joints well (extrados side). I have to fill this out.
 45January 25, 2018I use Vallejo plastic putty again. It is useful for filling small spaces between joints as it does not need to be sanded.
 46January 25, 2018The leftovers of this putty are easily removed after a few minutes (before it dries) with a damp cotton swab or even your own finger dipped in water. If the putty drieds, thin parts (such as those that have entered the panel lines) can be removed with a toothpick as it will not scratch the surface of the plastic.
 47January 25, 2018Putting Squadron's putty in the holes of mold marks of the center supports.
 48January 25, 2018Put a handmade filter at the engine's intakes.
 49January 25, 2018Viewing the result (not glued yet).
 50January 25, 2018Painting some panel and other parts with duraluminium from Vallejo on intrados.
 51January 25, 2018I do the same on extrados. Also painting with jet exhaust from Vallejo on a some engine's parts.
 52March 29, 2018Applying the first decals (from the new Italeri's tool) after painting the ends of the wings with a Gunze yellow. I got these decals thanks to a friend who gave me the leftovers from his kit. Extrados side.
 53March 29, 2018Applying the first decals (from the new Italeri's tool) after painting the ends of the wings with a Gunze yellow. I got these decals thanks to a friend who gave me the leftovers from his kit. Intrados side.
 54March 29, 2018They are good decals, but a bit thick. I had to go a little deep with the Microset/Microsol fixing liquids to adapt them to the panel lines.
 55March 29, 2018This engine part is not included in the old Italeri tool. I had as a reference the instructions for an engine part of the Airfix Do-17 and some photos of the original model.
 56March 29, 2018It is difficult to see how it is exactly, due to the lack of light inside the engines and the propeller in front of them.
 57March 29, 2018Here it can see too.
 58March 29, 2018It seems that here you can see better.
 59March 29, 2018Building from scratch the supports of the outer ring of the fairing of the engines with fine rigid copper wire.
 60March 29, 2018Building from scratch the supports of the outer ring of the fairing of the engines with fine rigid copper wire.
 61March 29, 2018One by one until finishing the "star" of the three engines.
 62March 29, 2018One of them finnished.
 63March 29, 2018Three engines finnished.
 64June 18, 2018Applying oils on panel lines and wash effect to the engine's fairings. Also painted propellers and spinners.
 65June 18, 2018Add "cornamusa (bagpipe??)" made from scratch and Montex masks for the cockpit windows.
 66June 18, 2018Add central support for the wings and masking the central turret.
 67June 18, 2018Lara's aluminium/silver paint.
 68June 18, 2018Decals from Italeri's kit (ref. 1323)
 69June 18, 2018A bit hard to fit. They are a bit thick.
 70June 18, 2018Finally I combine decals with painting.
 71June 18, 2018Applying oils. Intrados side.
 72June 18, 2018Oils applied. Extrados side.
 73June 18, 2018Oils applied. Intrados side.
 74June 18, 2018Oils applied.
 75June 18, 2018Oils applied.
 76June 18, 2018Oils applied.
 77June 18, 2018Oils applied.
 78July 10, 2018Wings installed.
 79July 10, 2018Wings installed.
 80July 13, 2018Viewing the result.
 81July 15, 2018Completely finished engines and propellers. Ready to put on the wings.
 82July 30, 2018Struts.
 83July 30, 2018Struts and part of the tail antenna mast.
 84July 30, 2018Tail antenna mast.
 85July 30, 2018Venturi tube.
 86July 30, 2018Venturi (both sides of one of studs).
 87July 30, 2018Handmade venturi tube from a piece of sprue (part 1).
 88July 30, 2018Handmade venturi tube from a piece of sprue (part 2).
 89July 30, 2018Handmade venturi tube from a piece of sprue (part 3).
 90July 30, 2018What is this? Antennas?
 91July 30, 2018No problem... We build it.
 92July 30, 2018Pitot tube and counterweights.
 93July 30, 2018Handles for the upper engines covers.
 94July 30, 2018Handles for the upper engines covers, antenna mast, venturi and other elements under the wings (counterweights, pitot tube and other antennas).
 95August 7, 2018Struts and venturi placed.
 96August 7, 2018Handles for the upper engines covers and antenna mast placed.
 97August 7, 2018Also tail antenna mast placed.
 98August 7, 2018Other elements under the wings (counterweights, pitot tube and other antennas). Extreme actuators should be painted in yellow.
 99August 7, 2018First attempts to remove the masks. The paint has been raised a little in some areas. This must be corrected.
 100August 7, 2018There is little distortion in the transparent parts of the cabin. The interior can look pretty good.
 101August 7, 2018There is little distortion in the transparent parts of the cabin. The interior can look pretty good.
 102August 7, 2018Before finishing this model, it's necessary to correct some things and place the exhausts, antenna wires and radio goniometer antenna.
 103August 11, 2018This glass it got inside the cockpit. I could get it out with difficulty, but it's difficult to put it back inside from outside.
 104August 11, 2018I have to think how to solve this...
 105August 19, 2018Problem solved
 106August 20, 2018Exhaust pipes painted.
 107August 27, 2018Exhaust pipes in their place.
 108August 27, 2018Making this tool with a piece of small diameter rigid wire...
 109August 27, 2018...to build the shackles that hold the radio wires.
 110August 27, 2018All shackles finnished.
 111August 27, 2018A test of what I intend to do.
 112August 27, 2018Preparing shackles and pipes to paint.
 113August 27, 2018Painted.
 114August 27, 2018Shackles in their place.
 115August 27, 2018Shackles, pipes and wires ready in this place.
 116August 27, 2018A new problem... splashed several drops of cyano into the area of one of the engines, propeller and one of the floats.
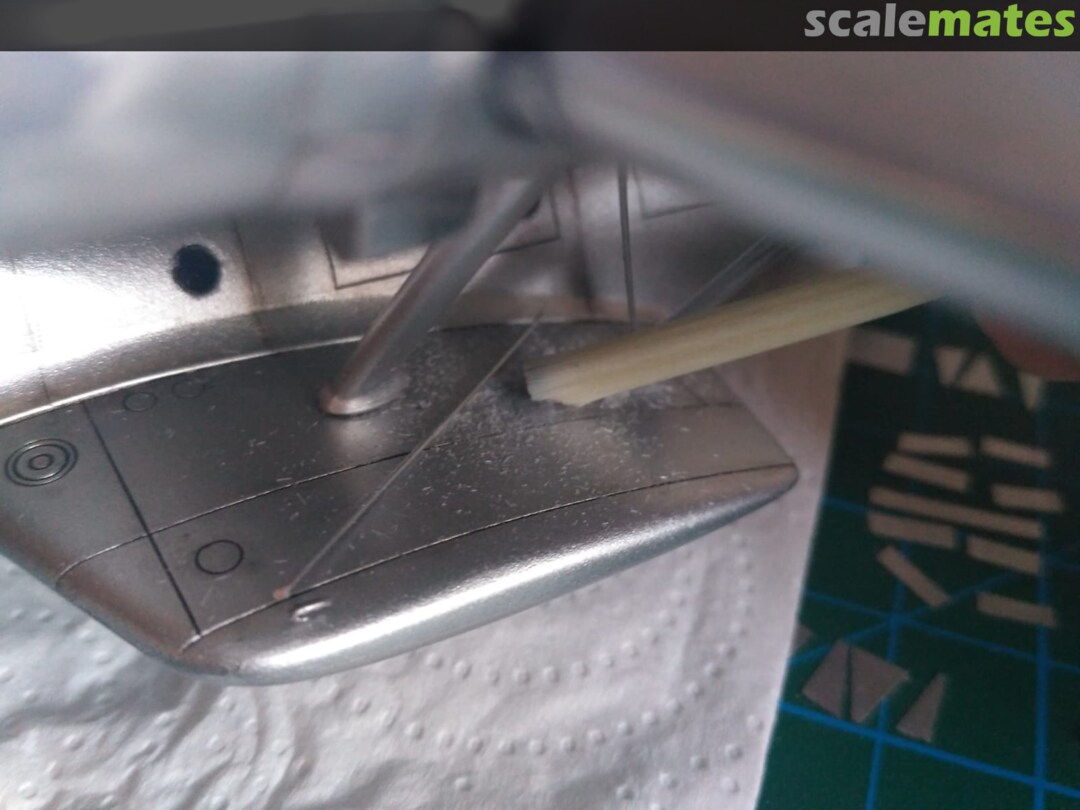
 117September 19, 2018Cyano drops sanded with a fiber pencil.
 118September 19, 2018Fiber pencil's rests and some small accident caused.
 119September 19, 2018Ready to paint again.
 120September 19, 2018Ready to paint again.
 121September 19, 2018Placing antenna cables.
 122September 19, 2018Placing antenna cables.
 123September 19, 2018Waiting to place a pair of small cables and radio goniometer. For this last I am waiting for a copy in resin.
 124March 13, 2019Radio goniometer painted and added.
 125March 13, 2019Radio goniometer added.
 126March 13, 2019More wires added.
 127March 13, 2019More wires added.
 128March 13, 2019Finished model.
 129March 13, 2019Finished model.
 130March 13, 2019Finished model.
 131March 13, 2019Finished model.
 132March 13, 2019Finished model.
 133March 13, 2019Finished model.
 134March 13, 2019Finished model.
 135March 13, 2019Finished model.
 136March 13, 2019Finished model.
 137March 13, 2019Finished model.
 138March 13, 2019Finished model.
 139March 13, 2019Finished model.
 140March 13, 2019Finished model.
 141March 13, 2019Finished model.
 142March 13, 2019Finished model.
 143March 13, 2019Finished model.
 144March 13, 2019Finished model.




Коментари
26 July 2026, 18:02 -

