


Sikorsky MH-53 JMSDF #25 - completed
















Hozzászólások
152 25 October 2020, 11:06
 Treehugger
Good luck on this 1:48 build. I had been wondering if maybe Bernhard was sticking to 1:72. Looking forward to this. 🙂
25 October 2020, 17:29
 Hanno Kleinecke
Once again, wire reinforcements make these items look functional ! No harm that the parts could not be separated without damage.....
25 October 2020, 18:03
 Bernhard Schrock Szerző
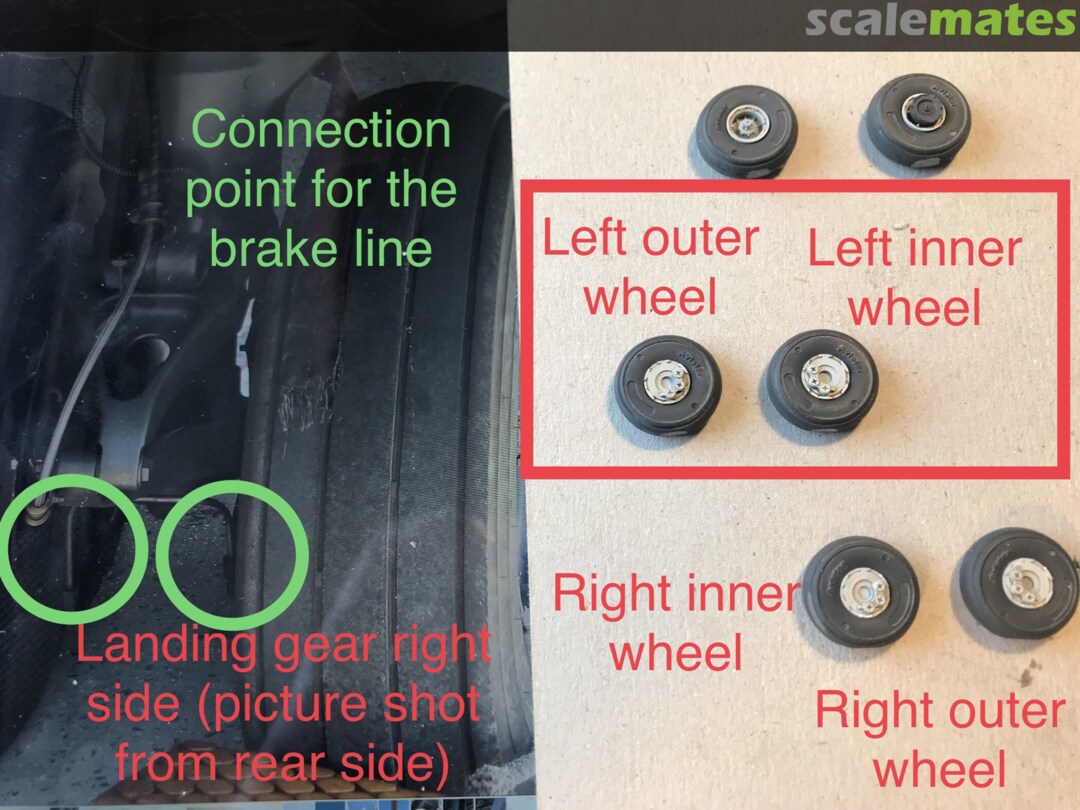
Yesterday I receive an answer from one of my mates who is building the same Helo. He supports my assumption that all there landing legs respectively all wheel wells are the same. This is only logical because all wheels are the same. The only difference is that the front wheels have no brakes. So I ordered two more Reskit's whell bays.
28 October 2020, 05:28

 Patrick Hagelstein
Bernhard is building something? No matter what it is; I'm in! Oh wait! It's an MH-53? Then I'm definitely in! 😄
28 October 2020, 15:50
 Sergej I
The thing is huge! Better make this thing fly😉
This build is going to be a great distraction for my own mojo 😄
28 October 2020, 21:41
Patrick HagelsteinSome creative problem solving going on there! Even though those landing gear bays are in essence boxes, Bernhard is thinking out of the boxes. 😉
29 October 2020, 01:17
 Melgg Lütschg
Definitely following too! Another great reference build started 🙂 I'll enjoy your skills and documentation!
29 October 2020, 10:23
 Slavo Hazucha
Taking a comfy chair for a treatment of tricks I like to watch but dare not to try to repeat yet!😉 Was already afraid you too will pick a 109! Or a 209 record plane (that would actually be rather interesting!). The more happy to see it´s a proper chopper! 👍
29 October 2020, 19:24
Bernhard Schrock SzerzőYou have no idea how happy I'm about so many people watching me build my next chopper🙂 I already mentioned in one caption that the kit is not specially detailed. I promise to post a lot of WIP pictures and tips.
Slavo: I already did my duty and build one 109...
Megaperl (Rote "26"), 1940 Henkel-Cup - finished | Album by Yellowwing (1:48)
29 October 2020, 20:12
 scalemates
nice! (ps: this newsfeed item was changed to "private", I fixed that)
29 October 2020, 22:08
 Nathan Dempsey
@Scalemates - that explains why I received private messages from Slavo & Bernhard with no content. 😄
29 October 2020, 23:46
Patrick Hagelstein@ Tim, I was wondering the same. Makes sense now. Thanks for the fix! 👍
30 October 2020, 03:57
 Oliver Zwiener
OMG , ich habe bei meinen Modellen die Lüftungsgitter immer nur aufgeklebt ohne die entsprechenden Stellen vorher sauber auszubohren ????
30 October 2020, 16:00
 Ben Schumacher
Ah, now we are talking! I have no idea how I have actually missed the beginning of this brilliant project. I will follow with huge interest!
2 November 2020, 09:12
 Bernhard Schrock Szerző
Thank you Mates. Despite of 2 GB of reference material I have no idea how the lower and upper gear housing for the tail rotor looks exactly. Because the interior is very well visible I had to improvise. That main thing is that it looks "important" and complicated. I remember the 80s modeling legend Shepard Paine calling this "Gizmology". 🙂
4 November 2020, 19:21
Patrick HagelsteinBernhard, you could ask Ronan for more information. He's building a highly detailed 1/72 MH-53J, he might have some pictures of that area.
4 November 2020, 21:07
Ben SchumacherBernhard, it's exactly as you say - it has to look busy and "realistic". I have spent quite some time researching the MH-553E as well and there is pretty much nothing showing this area in detail around.
5 November 2020, 07:15
 Alexander
Wow, impressive scratch building! 👍👍 Taking a seat und looking forward to your progress.
9 November 2020, 22:25
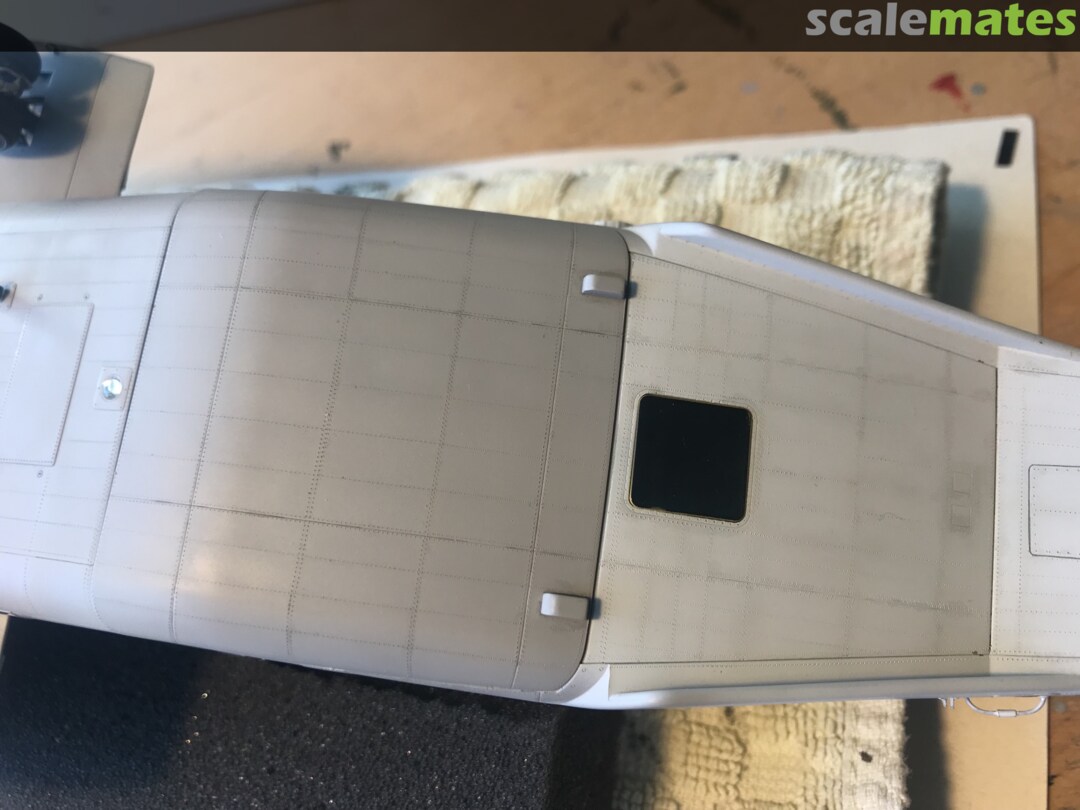
Bernhard Schrock SzerzőOne could say that all I did today was papering. As usual I produced my antiskid paper of left over durable decal covered with unthinned dark grey paint airbrushed with low pressure.
23 November 2020, 18:16
 bughunter
I hope that you have enough of this antiskid paper for your next projects, because it looks great! And I hate to not have the material or could not get it anymore after I found a working solution. And the small model supply companies may be quickly out of business for what ever reason. So I bought also a bigger number of Small Stuff engines for the kits in my stash for example😉
23 November 2020, 18:54
 Hanno Kleinecke
Anti skid pads look very realistic ! Have to bear that technique in mind ..... 👍
26 November 2020, 21:45
Ben SchumacherAbsolutely brilliant. I love your method to replicate the nonskid surfaces!
27 November 2020, 10:56
 Marco Preto
Brilliant work! I can not wait for more updates!
Cheers
mpminiatures.wordpress.com
27 November 2020, 13:58
 Lochsa River
very cool stuff, marco......and of course, Bernhard is on to another awesome project….
28 November 2020, 20:02
Bernhard Schrock SzerzőThank you for support and comments. I can use that because there are more problems. Today I prepared the much better detailed air filters (ResKit) and noticed that they are to big. The don't fit, not even a title. 🙁 Has anyone ever used them? I'm thankful for every idea.
28 November 2020, 20:10

 Augie
AugieBernhard, I've just done a size comparison between the filters for the Revell CH-53 and the Academy offering and they are same size, so I would err on the side that they are the right size 🤔
28 November 2020, 21:17
Bernhard Schrock SzerzőGood morning Augie. Thank you for checking the Revell kit and info. This morning I weight all possible variants and the effort they would need.
The resin parts are much better detailed and I intend to use them even though they may be too big. However I'm also going to use the "bulge" of the kit part.
29 November 2020, 09:20
AugieI think it was a good choice, they are superb.. might have to get me a set or two lol.
29 November 2020, 11:11
Ben SchumacherBernhard, are you sure the Res.Kit filters are too big? Possibly the Academy parts could be too small? There should have been a factory drawing of the EAPS (Engine Air Particle Separator) in the files I have sent you - if not, please let me know!
30 November 2020, 10:38
AugieI'd be interested in knowing that too Ben, I compared them with the Revell parts and they matched for size.. If indeed the Rezkit are right, then i'll be ordering a few sets for my own MH-53 and CH-53E
30 November 2020, 10:45
Bernhard Schrock SzerzőBen.
I think you are right; Reskit designed the filters correctly. Design 1:1 for a wrong size in the kit would be the wrong way. Because of that I decided to use Reskits parts and I'm now happy with the result.
Augie:
the effort was not so great. If you wish I could send you some hints and a sketch how exactly I did the job.
30 November 2020, 12:54
AugieHi Bernhard, I think I can see how you did it from the pics, Will let you know once mine turn up and I get to that part 🙂
30 November 2020, 14:27
Bernhard Schrock SzerzőHi Augie; OK. I add additional pic 52: maybe useful for you.
30 November 2020, 14:43
 Bernhard Schrock Szerző
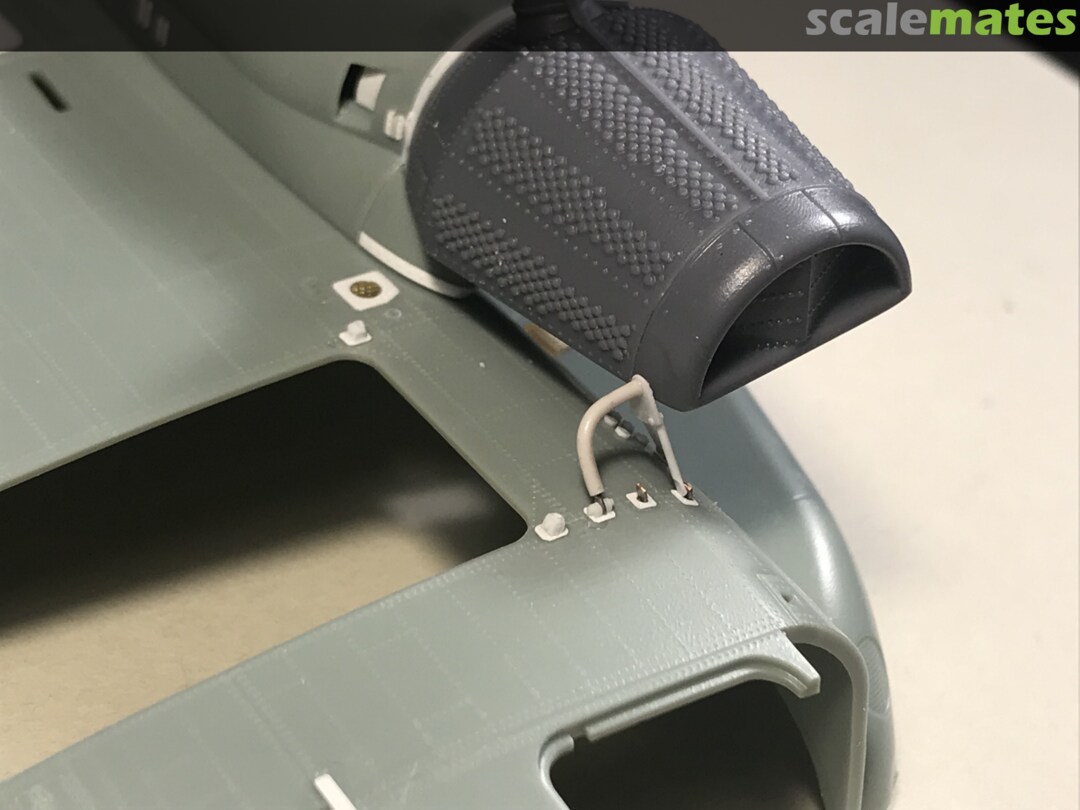
Today I wanted to make & install the support struts for the outer engines. When I did this I discovered two more mistakes. The air filters are not at a right angle from the floor. Things got a bit better when I removed about 0,5 mm of the engine shaft housings. This mistake has to be in the kit and not because I replaced the kit parts with resin parts.
Then I discovered that obviously the door on the right side is too large and do i installed all 6 mounting plates (3 for the winch and 3 for the air filters struts) too high. That means that I had to do it all over again. But it was worth it because I found a better solution to apply the struts.
7 December 2020, 17:49
Hanno KleineckeAs usual, your scratchbuilt details make the whole thing look so authentic as if they were functional . Augenprüfung bestanden ! 🙂
7 December 2020, 19:30
Bernhard Schrock SzerzőI'm glad to hear that you like my puzzle🙂. In the meantime I reached on this heli project a modeling phase I called "inner peace". I do not mind at all to busy myself with one small part for days. For example today i reworked the aftermarket resin intakes by gluing on several dozen slices of 0,5 mm round rod.
Next task: the winch on the right side. First I have to rework the winch housing witch is installed on rectangular base plate.
9 December 2020, 17:30
bughunterYou are the definitive master of scratch work in plastic! Impressive 👍
9 December 2020, 18:09
Patrick HagelsteinThis is so cool to watch (in no particular order and without discarding others) Hanno, Ben, Spanjaard, Augie, Bughunter and Ronan, whom I consider experts in their respective fields, marvel over Bernard's work. It's like a little tea party on Mount Olympus. 😉
15 December 2020, 19:41
Lochsa RiverIt's like a little tea party on Mount Olympus.
Indeed! And we mere mortals get to watch....
15 December 2020, 20:03
Lochsa RiverMister....i am going to use that "Tea Party on Mount Olympus" line for years to come...is that OK? Did you copyright it?
15 December 2020, 20:04
Bernhard Schrock SzerzőErm, I needed some help translating and digesting this. I am very honoured by your comments. However, I would like to stress that last time I looked, I was definitely mortal.😉
16 December 2020, 13:35
 Hanno Kleinecke
I'm very proud being considered part of this tea party with all of you, being inspired by Bernhards work time and again.
16 December 2020, 17:03
Patrick Hagelstein😄 Maybe Hercules would work better for you, Bernhard? As he's a demigod. 😉 Just saying that if very talented modelers are drooling over your project, you're doing something right, right? 😉
16 December 2020, 21:36
 Spanjaard
well, i am totally shocked (and deeply honoured) by being included in such a incredible group! specially since i have not done any modelling for far too long 🙁
16 December 2020, 22:19
 Bernhard Schrock Szerző
Thank you for all comments, they will give me new motivation:
I finally found very useful pictures of JMSDF MH-53 in the air from below. Why am I not surprised that the bottom of the kit contains a lot of mistakes: the contour other sidetank is not correct and the large hatch & rectangular antenna are too large...
27 December 2020, 20:59
Bernhard Schrock Szerző...the bottom of the heli is finished. Typically for such large multi purpose helicopter the bottom is full of sensors, antennas and mounting points for external equipment. The most of the elements were well visible on the few pictures taken from below. With the exception of the two small external hook hatches were I had to improvise.
31 December 2020, 13:58
Slavo HazuchaFinally a build progressing at a pace that I can somewhat understand (= not so fast...😉 )!
But it is a big bottom that needs handling then... And it looks exquisite. Almost a heresy to put paint on all that work. But then, I am soooo looking forward to seeing you replicate the appearance from the featured photograph! 👍
1 January 2021, 14:59
Bernhard Schrock SzerzőLittle progress: rudder pedals.
Despite of several GB original material I have invested about half of the time to understand the functionality of the rudder pedals.
4 January 2021, 17:29
Hanno KleineckeIf I'm counting right, that „Little progress" includes roughly ca. 50 parts of scratchbuilt pedalry per side ? 🙂
extraordinary ! 👍
4 January 2021, 17:41
Bernhard Schrock SzerzőThank you Hanno aka Eagleeye! Exactly they are 50 extra parts... Did you count left or right side? 🙂
4 January 2021, 18:12
Spanjaardcomparison with the kit part.... I am surprised that the original part has not jump by itself to the mouth of the carpet monster to disappear forever, out of shame.
4 January 2021, 22:07
Bernhard Schrock SzerzőSpanjaard: Indeed the kit parts deserve a just punishment even though they may plead for diminished responsibility: I have the feeling that Academy have upscaled their 1:72 kit...
The rudder pedals have decided against the carpet monster and chose lifelong banishment to the spare box colony.🙂
Clifford: thank you.
5 January 2021, 08:13
Bernhard Schrock SzerzőPremiere for the new product of Anyz Models bought several months ago: 3D printed knobs, switches in excellent quality. The handling is very easy and the result is excellent and much better than self made knobs. Highly recommend!
10 January 2021, 16:07
Hanno KleineckeLooking like a vast improvement, application using the piexkraft<CA klebkraft method as usual ? 🙂
10 January 2021, 19:14
Bernhard Schrock Szerző...not quite, gravity and viscosity help me: holes with 0,32 mm in the PE parts & 0,30 mm shafts of the knobs. CA applying from the bottom.
10 January 2021, 20:12
Slavo HazuchaThose 3D printed knobs really bring the Eduard-stuff back to the game! I was using some lead-wire cut-offs on my F-111, these look much better.
Excellent job on the whole cockpit sub-group cluster 👍
10 January 2021, 22:13
 Oliver Zwiener
Dieser Baubericht ist jeden Abend mein Pflichtprogramm , absolute Spitzenklasse das Cockpit !!!
14 January 2021, 19:26
Bernhard Schrock SzerzőThank you Oliver and Juergen. I tried a new technique/material for the electrical cables. I used a fine dark grey polyester thread and airbrushed this light grey (not white for lower contrast). The thread is easier to bend than wire with similar diameter and has a noticeable surface structure similar to cabletree (Kabelbaum).
14 January 2021, 20:45
Slavo HazuchaThis does not look like at all as any usual (or even unusual) 48-scale modeling... it truly is work in it´s own unique league...
Detail, Clarity, Cleanness - one & only - fantastic job 👍
14 January 2021, 21:08
Hanno KleineckeThe thread makes a very realistic wiring effect, excellent idea 👍
The Anyz knobs on the instrument panels look real good
14 January 2021, 22:33
Ben SchumacherBrilliant as usual, Bernhard! Have you sealed the Eduard parts with matt varnish? In my opinion, this hugely improves the overall finish of those parts.
15 January 2021, 07:51
 Florian H.
Sehr sehr imponierend 👍 Wie hast du denn die roten Lüftungsschläuche so "bemustert"?
22 January 2021, 12:01
Bernhard Schrock SzerzőFlorian H. Danke danke danke für das Lob.
Es ist der orangefarbene Draht aus einem Cat 7 Kabel mit einem recht weichen Mantel. Zuerst habe ich mit einer fotogeätzen Säge (0,4 mm stark) versucht jede Rille einzeln einzurollen, leider mit bescheidenem Ergebnis, da die Abstände ungleich waren. Dann habe ich die Säge ein bisschen schräg gestellt und so gleichmäßige Abstände erreicht.
22 January 2021, 17:26
Florian H.Hi Bernhard, vielen Dank für die Erklärung 🙂 Wenn du noch Akzente setzen willst, könntest du die Rillen noch weiß bemalen, siehe hier [img1]

22 January 2021, 17:52
bughunterDas könnte auch nur durch den Blitz so weiß aussehen, ich würde vermuten da läuft ein Draht um.
22 January 2021, 17:56
Florian H.Nein, es läuft ein Draht durch, der allerdings nur von innen zu sehen ist (stahlfarbend) und aussen ein weisses Seil, so wie hier besser zu sehen
[img1]

22 January 2021, 17:57
Bernhard Schrock SzerzőWeiße Akzente: in etwa so?
Working station of pilot and copilot completed minus spiral cables (intercom and cockpit lights).
22 January 2021, 18:30
Bernhard Schrock SzerzőThank you David.
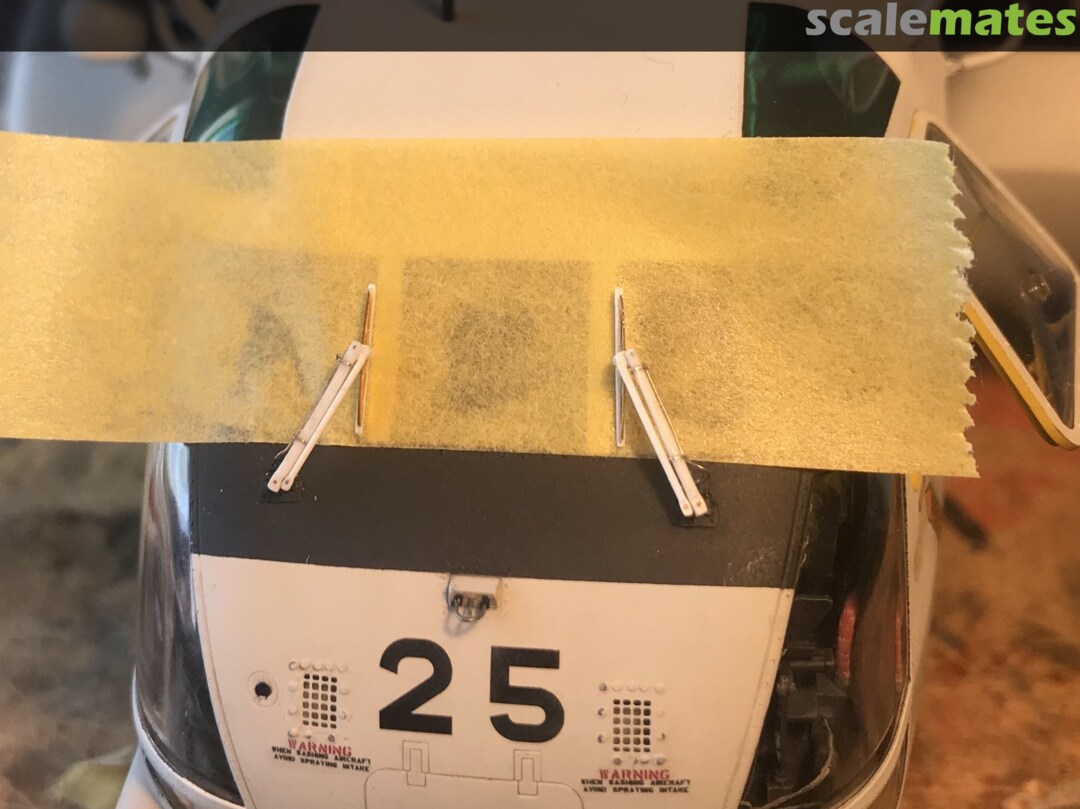
Today I worked on the clear nose part and noticed that the complete interior is visible through the large side windows. Because if that I installed some gizmos on the inside such as wiper motors and air conditioning boxes behind the inlets gills. The orange tube and some white cables coming soon.
Then I realized based on excellent pictures of JMSDF machines that the interior is mostly wrong🙁 , to put in mildly. So I will close the ramp and the door.
23 January 2021, 17:16
 Alec K
Is it too late to correct the interior to allow for open ramp and doors? Or am I not understanding correctly?
25 January 2021, 13:10
Bernhard Schrock SzerzőThank you Alec and Norbert.
Alec: it's not to late but "correcting" it's not the right word. The interior especially the side walls it's completely empty nearly without details. And everything that is there is totally wrong. Because of that I intend to build some details visible throughout the windows. For example I posted a picture of the JMSDF interior. If I tried to build all that I would never finish....
25 January 2021, 18:56
Alec KAh, now I understand. Yes, I saw that picture and it looks, well, busy 🙂. It's going to be a magnificent build in either case 👍
26 January 2021, 01:27
 Dietmar Bogatzki
Ganz großes Kino was du hier zeigs, Bernhard, so viele Details, die kaum jemand zu sehen/ schätzen wird..
11 February 2021, 18:06
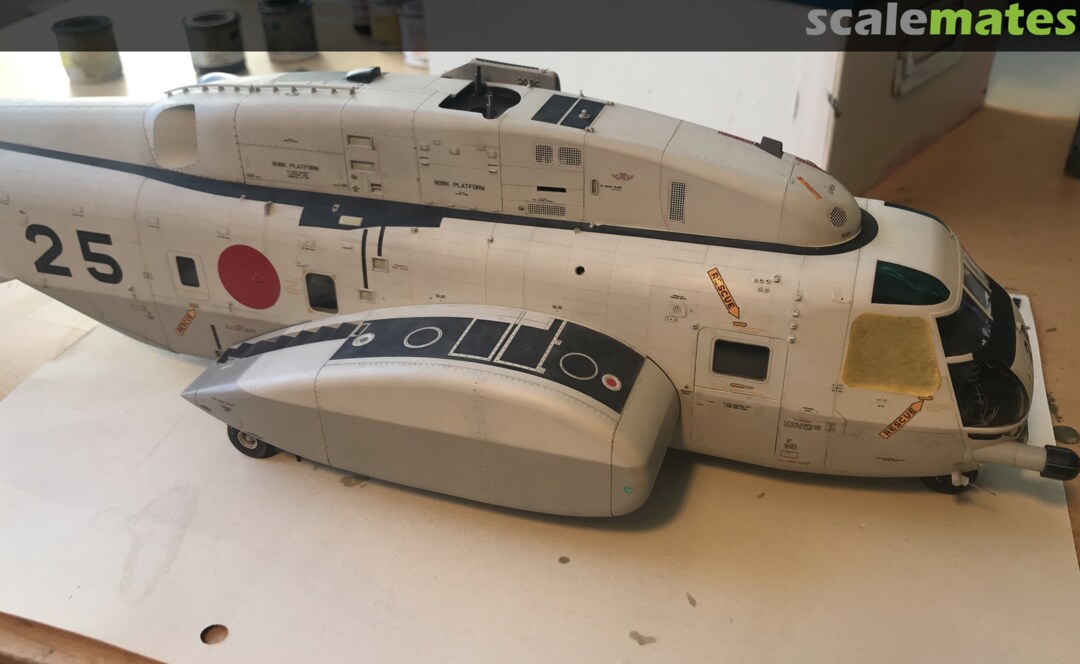
Bernhard Schrock SzerzőYesterday I managed the last task in the main cabin before gluing the fuselage together. I noticed during dry fitting the large side sponsons / tanks that for clean fit without gaps you need counter pressure from the inside. This is difficult to achieve if you have glued the fuselage halves together. So I decided to glue the side sponsons / tanks before closing the fuselage. As usual I created some auxiliary holes for applying CA glue from the inside. There are well visible in the picture. After breakfast more pictures of the completing task.
14 February 2021, 07:45
Bernhard Schrock SzerzőThx Hanno. I used the a bit thicker foil from a roll, about 8 cm width. Used usually for sealing gaps in airconditioning systems.
15 February 2021, 14:01
 Brandon H
I'm half expecting this thing to just get up and fly away any day now. Amazing work!
16 February 2021, 12:23
 Eric Juvyns
Your eye for detail is incredible! If you don't mind I'm gone use your build as reference/inspiration for my own CH-53E build somewhere in the future.
16 February 2021, 12:32
Slavo HazuchaSuper work on every step..!
- The Cockpit detail is beyond any comparison - only thing left is to add some of these typical knots into those "classic" telephone cables 👍
- The sealed windows look like taken out of the real thing - I´d be interested to know more, I plan my own sealant experiment for the MiG´s 👍
- The exhaust looks fabulous, excellent metal work and scale details, including thicknesses, colors & all 👍
Finally - I´d be interested to see more of the intakes and the "cheesegrinders", on the photos they look very promising, any magic applied there?
16 February 2021, 13:16
Bernhard Schrock SzerzőThank you Eric, Slavo and Clifford.
Eric: I'm very honored. You have an unlimited permission to use all my research results🙂 Warning: the seam to be no two identical MH-53🙂.
Slavo: I'm not sure what you mean. Tamina tape masked front windows? All three cheese grinders 🙂 are excellent 3D created by Reskit. For No 1 and 3 I used masks and airbrushed them. No 2 has an slightly different color layout and so I painted the round raised cylinders via dry brushing.
17 February 2021, 12:10
 Dietmar Bogatzki
Sprachlos, so viele Details und Fehlerbeseitigungen, wieviel ist nachher vom Originalbausatz noch vorhanden 😉
18 February 2021, 09:17
Bernhard Schrock SzerzőDanke Dietmar. Der Bausatz ist in Wahrheit in meinen Augen eine Einladung zum Korrigieren und zum Scratchen. Der MH-53 ist ein wahrer Gigant mit einer unglaublichen Fülle von Details an der Oberfläche. In 72 würde m.E. Academy's leere Oberfläche vielleicht noch durchgehen, nicht aber in 1:48... eigentlich habe ich keine Wahl...🙂
18 February 2021, 15:19
Hanno Kleinecke🙂 klarer Fall von Notwehr 🙂 Ich bin mir aber sicher, dass auch in 72 hier kein Stein auf dem anderen geblieben wäre........ Good for all the stunned spectating rest of us Wonderful detailing of the fuselage surface
18 February 2021, 16:30
Dietmar BogatzkiSicher bietet der Bausatz viel Platz für Verbesserungen Bernhard, aber man muss die auch so gekonnt ausführen können wie du, ganz großes Kino 🙂
18 February 2021, 17:43
Dietmar BogatzkiSuper Fortschritte, Bernhard, wie hast du den Antirutschbelag so toll hinbekommen?
25 February 2021, 10:33
Bernhard Schrock SzerzőVielen Dank Dietmar. Der Antirutschbelag ist selbst gemacht: ein überschüssiger Decalbogen den ich von DF Hello Stuff bekommen habe, vollflächig mit einem sehr robusten aber trotzdem dünnen Trägerfilm versehen als Basis verwendet. Dunkelgraue seidenmatte Humbrol Farbe unverdünnt mit einem sehr geringen Druck gesprüht und 15 Minuten danach mit 1800 Micro Mesh die Struktur reingedrückt.
25 February 2021, 12:46
Dietmar BogatzkiEcht Klasse geworden und gut zu wissen das es Helo Stuff noch gibt. Weiterhin viel Spass bei dem Heli
25 February 2021, 13:25
 Michael Papay
Wahnsinn was du da zauberst, kann man gar nicht oft genug sagen
27 February 2021, 10:07
bughunterEvery picture in this build shows a little wonder 👍 The finished model will again be one to dream about!
27 February 2021, 14:51
Bernhard Schrock SzerzőThank you Dietmar, Michael and bughunter.
Today I demasked the cockpit and I had my own private miracle: no CA fogging and nearly no dust particles🙂 I'm very satisfied. Time for celebrate with a glass wine. 🙂
27 February 2021, 16:14
Hanno KleineckePrösterchen ! 🙂 superclean and superclear result 👍
All the delicate pedalry and wiring is well visible
27 February 2021, 16:57
Bernhard Schrock SzerzőHouston; I HAVE A BIG PROBLEM. Today I began with applying the Wolfpack decals. The first (bad) experience / results there I made with the engines have come back full impact: I can't get rid of the silvering. I have tried everything and all fluids. Nothing works. Not even the Tamiya decal adhesive. Does anyone have an idea?
Without a durable solution I will have to omit all maintenance stencils.....
28 February 2021, 18:26
AugieI've pierced silvered decals before and massaged future under them with a cotton bud.. its not guaranteed, but Its saved my arse a few times
Or try something like micro kristal clear thinned down instead of the future.
28 February 2021, 18:30
 Bernhard Schrock Szerző
Thank you Augie and Nathan. I tried yesterday you trick with Future but it did not work well because I will need a dull finish coat. And this is exactly what I do wanted avoid. I remembered yesterday a very old trick by using an old Hasegawa decal sheet with a very thick and powerful glue. I made a very interesting discovery that my silvering was not on the underside but on the upper side of the decals. I sanded very carefully the very top shiny coat of the decals and reached the expected result. Fortunately the decals are printed with a top clear coat ...
1 March 2021, 11:20
Michael PapaySilvering on the upper side, good to know. Great the you found a solution
1 March 2021, 12:04
Dietmar BogatzkiSilvering on the upper side, strange but good to know what to do then..
1 March 2021, 13:01
Slavo HazuchaWell, the result looks absolutely convincing, no silvering visible anywhere, no perception in change of thickness either... Looks as painted on, for all purposes - whatever treatment will follow, I´d expect it to look just perfect on this base! 👍
Also the teal upper windows look just fabulous contrasting to the surrounding white, top!
1 March 2021, 13:28
Marco PretoI've said it before and I'll say it again: This is one of the most impressive builds I've ever seen.
Congratulations! I'll stay tuned, eagerly waiting for the completed model!
Cheers
mpminiatures.wordpress.com
Instagram: @marco_a_c_preto
2 March 2021, 11:14
Bernhard Schrock SzerzőThank you Mates. I'm glad that I could share my new experience with you.🙂
Yesterday I applied the last decals on the lower side. Today it was time for the second antiskidmat papering session. First I produced new paper (airbrushed thick dark grey paint on spare decal film).
4 March 2021, 17:37
Lochsa Rivercool suggestion about the anti skid material, Bernhard....it looks great
4 March 2021, 18:30
Bernhard Schrock SzerzőThx Lochsa_River. It's easy to produce them.
„Antiskid papering" is now completed. Washing at next tomorrow.
5 March 2021, 18:30
 Alexander Grivonev
What is up with the crazy detailed helicopters on here lately 😄
5 March 2021, 20:54
TreehuggerI am happy for Bernard, this all looks very nice I think. 🙂 I hope he has this models on display in the open at home and not locked away in some room.
6 March 2021, 14:35
Bernhard Schrock SzerzőThank you David, Alexander and Daniel.
Treehuger: You are so right. I'm looking impatient for the next exhibition. Both exhibitions in 2020 (Lingen and Lübeck) were canceled. Don't know when it will be possible to take part in an exhibition without a mask....
At last I finished today the washing and filtering the surface and begun with installation of external stuff. At first the round antenna on the left side.
6 March 2021, 15:20
TreehuggerBtw, I made sure I keep my display cabinets at home, right beside my computer table, and in the living room, so that I get to look at it whenever I want. 🙂
6 March 2021, 15:39
Slavo HazuchaI´m watching, not saying anything cause it would be like interrupting Leonardo while he´s finishing Mona Lisa´s smile...😉 👍 Great show, truly!
8 March 2021, 14:01
Bernhard Schrock SzerzőThank you for the compliment. My motto is more like Journey before destination...🙂
Left outer engine in place without mess. Exactly preparation was very helpful.
8 March 2021, 18:43
 David Taylor
I was taught the 6 p's.Proper preperation prevents p--- poor performance.
8 March 2021, 19:29
 Kerry COX
What a pleasure to drift through all the images of your work progress Bernhard. ! 👍
The detail you have added has set this model heads and tails above any other MH-53 build I have seen. 🙂
Inspirational is the word that comes to mind. 👍
A BIG salute to you my friend. 👍 👍 👍
11 March 2021, 08:51
 David Funke
Thank you Bernhard! Because of your great work, my MH-53 will probably stay in the box forever. I would always compare my model with yours and never reach your level.
11 March 2021, 20:15
bughunterAgain fantastic details! I really love the metal bands to hold the cable to the mirrors with a black band underneath 👍
12 March 2021, 19:47
Alexander GrivonevIf this thing does not take off in the end I will be disappointed😄. Simply eye watering work 👍
12 March 2021, 21:28
 Juergen Klinglhuber
Hi Bernhard - another great build. Everythings looks so perfect and clean - congrats !
13 March 2021, 08:06
Bernhard Schrock SzerzőYesterday I finished the mirrors but the joy was not long. Today i "remembered" that the mirrors should be installed on the lower fuselage which is in this area grey and not white... 🙁
13 March 2021, 12:31
Hanno KleineckeGood to see this beast on it's feet, great idea to leave the windows opened, looks very good !
Shame that you have to respray the mirrors and beams......
13 March 2021, 19:01
Bernhard Schrock SzerzőI'm very happy to see how you follow my project. Thank you!!
First I tried to brush the areas between the black/metalic strips gray but the result was pretty shitty... so I ripped all parts of and did everything all over again 🙂
13 March 2021, 19:24
Bernhard Schrock SzerzőDavid: 2years ago I build for fun this truck:
Dekotora Truck ("Spirit of Jonathan") | Project by Yellowwing (1:32)
In the kit was a large sheet of mirror foil.
14 March 2021, 08:52
bughunterHast Du eine Quelle für dieses Black Magic Tape? Da finde ich alles mögliche, aber nichts, was so dünn wie Deins aussieht. Hätte ich heute wohl gut gebrauchen können.
16 March 2021, 13:26
Alexander GrivonevProbably one of Your finest builds so far, Bernhard. I like your no compromise approach and precision. Now I truly believe your claims to be an engineer😄
21 March 2021, 09:51
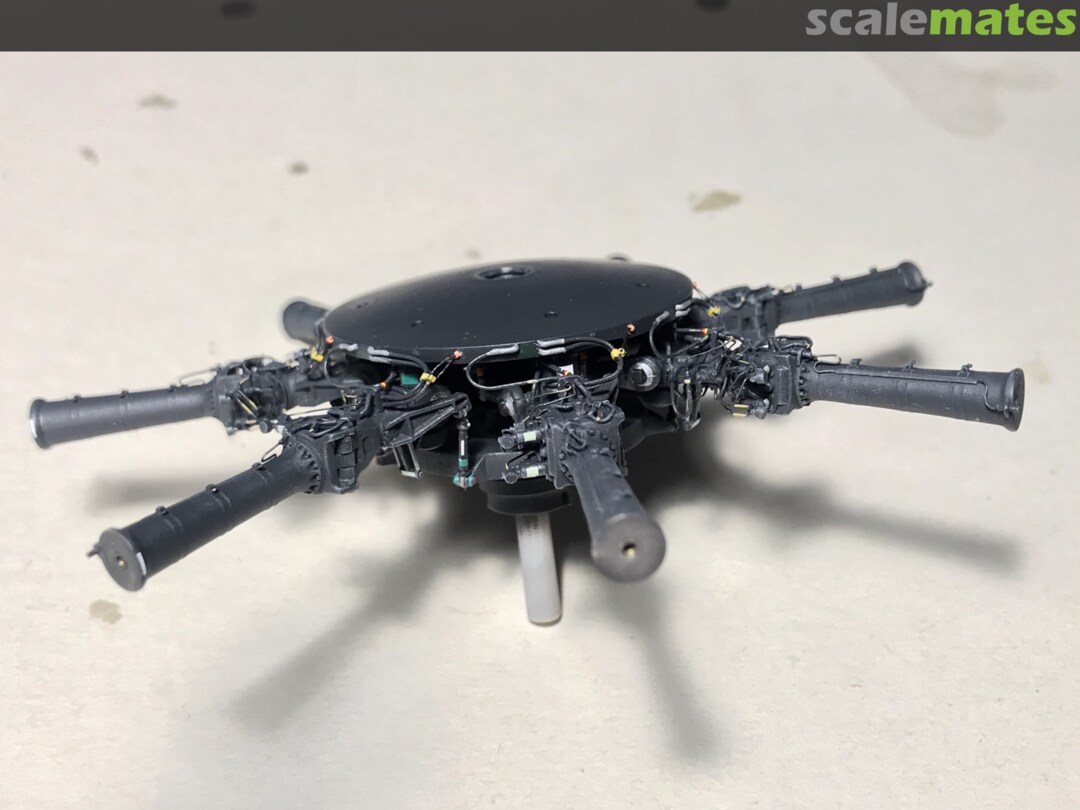
bughunterThis rotor head is a model of its own! It has more parts as one of my biplanes at all 🤔
21 March 2021, 15:12
 Norbert Steffens
Hi Bernhard, oustanding build...... I also face the issue that detail ups from resin have a poor quality, annoying...
25 March 2021, 06:16
 Neil
NeilJust checked out this album. Speechless - not just modelling this is engineering. Stunning work. Agree with all. ?
29 March 2021, 18:43
 Peppy
Peppy I liked this about a week ago and it keeps popping up
in my feed with more pictures. LOL
This is staggering in scope. Some of you guys make
me want to run my stuff over with the lawn mower. ?
It is unreal.
I really believe you guys are missing your true calling.
Excellent, I'm in till the end.
2 April 2021, 20:49
Bernhard Schrock SzerzőThank you for all comments. I'm glad that you like my work🙂
Yesterday I thought about how to transport the rotor (really large!!). I decided to divide the blade at the same point like on the original. Unfortunately the connecting plate with the 8 prominent screws is missing in the kit so I had to add a 0,5 mm thick disc of plastic to the short round conical shaft. I intend to build the rotor with detachable blades (1,3 mm tube in the shaft and 0,9 mm steel rod in the blade).
3 April 2021, 05:19
Hanno KleineckeThe wire-master in a wiring frenzy...... man, you keep constantly pushing the envelope here,
and the blade connectors haven't even joined the rotorhead yet.
Superlatives beginning to fail 👍
3 April 2021, 07:19
 Oliver Zwiener
Bild 266 ist für mich elementar, um überhaupt noch zu verstehen, was in den folgenden Prozessen geschieht ..... , so nahe kommt man einem Rotor sonst ja nie im Leben, sei denn man gehört zum Wartungspersonal einer Instandsetzungsstaffel. Sehr beeindruckend - dafür 5 ***** !
8 April 2021, 05:37
Ben SchumacherHochgradig beeindruckend, Bernhard! Sehr schade, dass Lingen dieses Jahr wieder ins Wasser fällt - ich hätte das Modell zu gerne mal live gesehen. Und ich hätte mich sehr gefreut, dich nach all den Jahren endlich mal wieder zu treffen...
8 April 2021, 07:46
Bernhard Schrock SzerzőYou comments are the best motivation I can imagine🙂
Oliver: in der Tat hast du den Nagel auf den Kopf getroffen. Das Nachbauen ist das eine, aber das verstehen „von wo nach wo welcher Schlauch und Kabel geht und wo er angeschlossen ist" ist eine zweite Geschichte. Unzählige Stunden habe ich viele Bilder studiert, aus allen möglichen Richtungen ausgewertet um um den Verlauf heraus zu bekommen. Dazu kommt noch die Schwierigkeit, dass es drei linke und 3 rechte Gelenke gibt, die nicht gleich verkabelt sind und dass die japanischen MH 53 sich deutlich von den amerikanischen unterscheiden... Es ist unglaublich was sich die Konstrukteure bei Sikorsky ausgedacht haben: eine herausragende Ingenieurleistung. Genaugenommen habe ich vielleicht nur 60 % der Schläuche und Kabel realisiert.
8 April 2021, 08:27
Bernhard Schrock SzerzőBen: in der Tat sehr sehr sehr schade, dass 2021 auch keine Ausstellung stattfindet🙁. Ich habe darüber nachgedacht, dass ich zu mir paar Leute zum Grillen einlade (natürlich wenn sich die Situation entspannt) um dies mit einer Art kleine Privatausstellung auf dem Wohnzimmertisch kombiniere.
8 April 2021, 08:30
Alexander GrivonevJust for my own understanding: you main rotor head consists of almost 1000 parts??
8 April 2021, 09:21
Bernhard Schrock SzerzőMoin Alexander: Jou. Die Achse ist dran und im Moment montiere ich die Kabel zum Hut an den Anschlussstücken. Pitchlinks und Kleinkram an den Blättern fehlen noch. Ich schätze, dass der „Zähler" bei ca. 1070-1080 stehen bleibt.
8 April 2021, 09:29
TreehuggerQ: Not sure if already mentioned by you Bernhard, but do you rely on magnification tools for working with all these tiny parts?
8 April 2021, 10:31
 Christoph Schnarr
incredible implementation of the details on the rotor head. Bernhard at his best 👍
8 April 2021, 14:27
Dietmar BogatzkiAbsoluter Wahnsinn der Rotor, hat vermutlich mehr Teile als viele Bausätze 👍
9 April 2021, 17:14
Eric JuvynsIncredible!!
Can I ask what kind of visor/magnifying device you use?
10 April 2021, 07:01
Bernhard Schrock SzerzőTreehugger & Eric: thank you for the praise. I'm short-sighted but fortunately I can see very well up close. That means I don't need magnifying glasses. But I'm trying to limit my hours on a project to not strain my eyes. That's why this is taking so long.
10 April 2021, 07:40
 Christian Kohl
More than well done, mate! This is sick and cracy! Please geht me right 🙂
10 April 2021, 18:08
Spanjaardthis is beyond attention for detail. it is simply modelling at its best.
10 April 2021, 19:40
Dietmar BogatzkiWirklich beeindruckend wie du umsetzt was man auf den Originalfotos sieht, Bernhard 👍
11 April 2021, 08:09
Bernhard Schrock SzerzőThis morning I attached all hydraulic lines to the hat. The dual lines on the right side have a double support rubber line for preventing flutter when the rotor turns. First I tried to use 0,14 mm wire but this turned out to be too large (!!!). Because of that I used fine polyester thread.
Now I have a few meters to run: the finishing line is clearly visible 🙂
11 April 2021, 08:32
Hanno KleineckeWhen 1/48 looks like 1/1 it can only be Mr. Schrock building some model...... just make sure the hydraulic pump is set to the right pressure !
11 April 2021, 09:22
 Lex Jassies
The construction of the rotor followed with increasing admiration. Too bad there are no modeling competitions because of the Covid. Your helicopter would certainly be a prize winner.
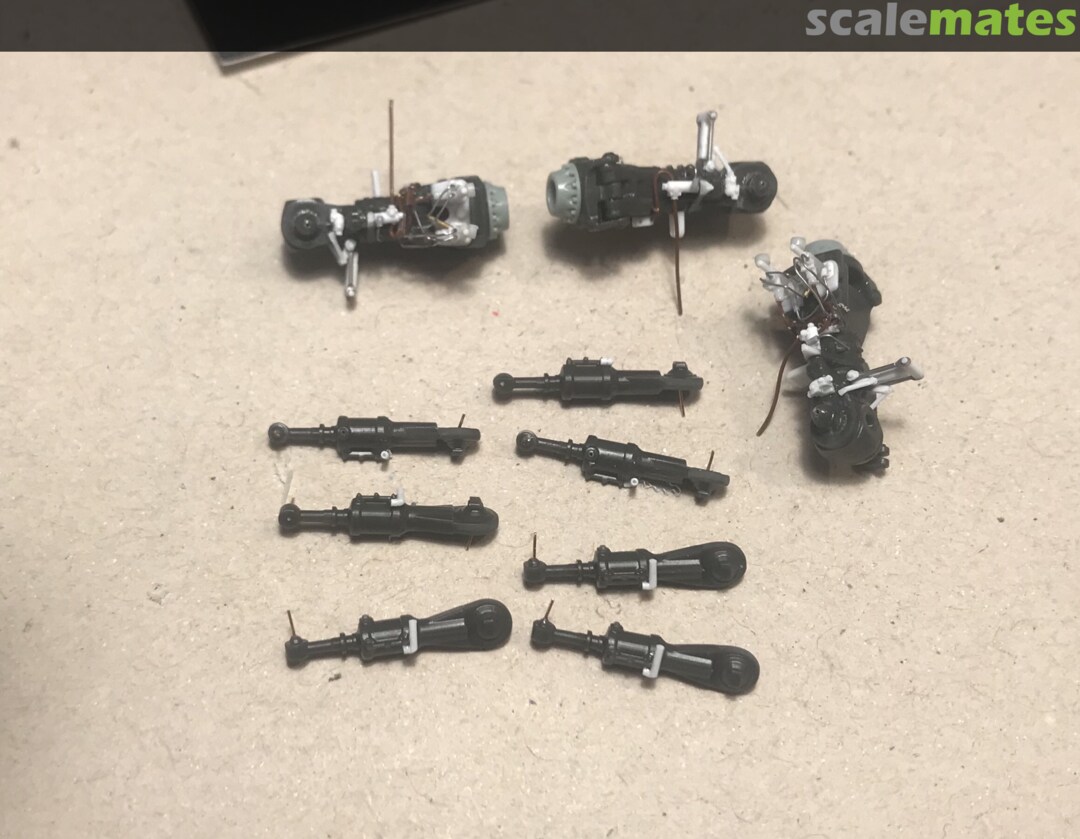
Funny that the parts in photo 262 look like robot heads to me 🙂
11 April 2021, 14:51
bughunterAbsolutely awesome! The rotor head alone has more parts than the parts of the models in my display case in total! 😳 Just looking at the original photo of the rotor head would have driven me away.
12 April 2021, 11:51
Bernhard Schrock SzerzőThe longest project in my "modeling career" is at last finished. Many thanks for all likes, motivating comments and support. There is just one picture for now: the Heli is too large for my standard photo set so I have to invent something new. 🙂
13 April 2021, 17:53
Florian H.Congratulations to that amazing built 👍 BUT there is a really big mistake, you forgot to fill in the hydraulic fluid to the mainrotor 😄
13 April 2021, 18:05
Hanno KleineckeFertig, Tusch und Applaus ! Makes me think: More depth in detail is almost impossible........but maybe, if I keep a close eye on this workbench.....
Congratulations, this is top of the tops !
13 April 2021, 18:52
 Clifford Keesler
Just beyond words. An excellent build Bernhard. Like Daniel many bows sir.
13 April 2021, 21:48
Sergej IThis looks much better than the original, Bernhard! 👍 You are the master. We are scrubs.
13 April 2021, 21:49

 Gary Kitchen
Bernhard- this is mind-blowingly awesome levels of detail and build quality. Just wow! Hats off to you.
14 April 2021, 06:16

 Neuling
Can a copy be better than the original? I was convinced: no. Seeing your model I´m afraid I have to rethink .......... 👍👍👍
14 April 2021, 08:07
Alec KThis is truly a magnificent build, really a joy to follow. Very, very impressive 👍
14 April 2021, 11:53
 Nathan Dempsey
Wow Bernhard! You sir, prove that nothing is impossible given enough skill and determination. I salute you 🙂
14 April 2021, 14:58

 Lenny Hoffmann
Absoluter hammer. Die CH-53 schaut unglaublich aus...diese Details ಠ_ಠ
14 April 2021, 16:16
AlexanderAll you need is some good weather and appropriate lighting and camera view and you couldn't tell the difference between yours and the real vehicle. 👍
14 April 2021, 16:47
Christoph SchnarrVery impressive model, superbly built, superbly detailed and superbly painted. Very excellent Bernhard!!!
14 April 2021, 17:31
 Alexey Alexeev
it's awesome. after that i can call my "Project" only how school home work =(.
14 April 2021, 18:23
Bernhard Schrock SzerzőI'm overwhelmed about your comments!!🙂 I was not really happy with the first batch of pictures and so I reactivated my other photo set.
14 April 2021, 19:08
Spanjaardi wanted to say that it just needed the right background..... but you also resolved that 😉
14 April 2021, 19:41
 Daniel Klink
Last pic is original... for sure 🙂
Well deserved Bernhard, the pics of your model are so authtentic crazy really
14 April 2021, 19:47
 Mark D
Impressive detailing! skills, patience and good reference material absolutely needed 🙂
14 April 2021, 21:04
Juergen KlinglhuberVery impressive - this is amazingly reallistic. Thx for sharing and giving the chance for particibating this build journey. top 👍
17 April 2021, 06:52
 akira kita
Congratulations on the completion. The great Meister's work is appropriate for the Chief of Staff's room JMSDF.(^o^)
17 April 2021, 13:56
Hanno KleineckeSaw this giant in reality today, as usual phtos don't do justice - this is the ultimate masterpiece in modelbuilding. Breathless admiration 👍
19 April 2021, 12:43
Bernhard Schrock SzerzőHopefully next year in Lingen. I hope can fit some of my helis in the car...
20 April 2021, 15:16
 Eric Lamare
Bernhard, this is the most detailed and beautiful Model I have ever seen. It really looks like a real MH53. And in Japanese colours to look even cleaner ! Can you tell how many parts and work hours you put in this build ? Just curious. All your kits looks really great, but this one is above all others in terms of complexity and details. Phantastic ?
20 April 2021, 15:55
Bernhard Schrock SzerzőEric, I'm honoured about your comment. Thank you. Indeed as you mentioned this is the longest and most complex build I've managed ever. The entire build took nearly six months. I don't know how many hours and how many parts I put in this project. I think because of corona I had more time than usually ... maybe 15 hours /week? 60-65 hours / month? In total maybe 360-400 hours? I don't know. Just for fun I counted the parts when building the main rotor and the counter stopped at 1095 parts... I think the „rest" of the heli consists of 2500-3000 extra parts?
20 April 2021, 17:26
Slavo HazuchaBehold the king of choppers, and rejoice in his light... 👍
Rarely do we see 5-6 model´s worth of excellence & details in one build, but here we are (the rotor alone making for 2 😉 )
It´s always a pleasure to see how far our hobby can be stretched, great show & top pics, was an honor following the whole build!
20 April 2021, 17:38
Patrick Hagelstein3595-4095 parts and all equally well executed.... Amazing.... 😮
21 April 2021, 13:51
 Tom
TomHallo Bernhard,
leider lange nichts mehr von dir gehört, ich hoffe dich bald auf Messen wieder zu sehen. Dein Heli: einfach sagenhaft, würde jedes Magazin bis nach Japan ehren, Wow! 🙂
5 May 2021, 18:24

 Ralf Topeters
Atemberaubend Bernhard! Sieht echter aus als der echte echt ehrlich!!! 👍 👍 👍
20 May 2021, 14:54


 Edgaras Jurkonis
Amazing build, like all of your builds. I learn so much just by going through the pictures and reading your remarks.
If I may ask, what reference books or walkarounds You are using for this one and for the MH-101 builds?
They're on my "to do" list, and I'd like to start collecting reference material so that maybe one day I can work on them.
Without a doubt, your step-by-step guidance is already worth more than any reference book 🙂
2 24 February, 06:29


