


Tamiya FU4-1D Groupbuild




Commenti
121 24 June 2025, 12:26

 Michael Kohl Autore
As I suppose that one or two guys here are interested in this, I feel free to share the results of some research my friend Michael has done on interiour color of the Corsair.
I quote:
it is reasonable to believe that internal structures were painted Zinc-Chromat-Yellow (ZCY). Cockpits were colored "Dull Dark Green" (early F4U-1) and afterwards "Interior Green". This should apply to the inside of the engine cowlings too, but pictures with grey insides can be found as well. Wheel wells were probably coated in ZCY, but were often overpainted with the wing color, i. e. Seagloss Blue or for the ones with the 4 tone pattern in Insignia White. This applies to insides and outsides of the wheel well covers too.
End quote.
Although already a bit older and not including the latest findings the site from IPMS Stockholm is still of valuable help here:
ipmsstockholm.se/hom..raft-1941-45-part-i/
So I probably should have colored my cockpit a bit darker/greener while the rest still seems to be in line with history.
To add a bit of visual interest I colored the front part of the engine cowlings in grey while the rest "remained" ZCY and I will stick to ZCY for the inside of the wheel wells and the inside faces of the wheel well covers too.
To break up the monochromatic Gloss Sea Blue design I want to go for the 4-color-pattern at the engine cowling - as if it was replaced by one of an older plane.
Let´s see how this turns out...
1 25 June 2025, 09:23
 bughunter
If you have not yet been infected with AMS, we can now be sure that you are carrying this virus. And it cannot be treated, you can only live it out intensively.
In case someone do not know what AMS is: Advanced Modeling Syndrom.
4 25 June 2025, 09:35

 Dave Flitton
Most excellent beginning! I will have to use this as a reference when I do more of my corsairs
1 9 July 2025, 19:27
Michael Kohl AutoreThanks for your interest mates. There will be a longer break as holiday doesn't permit modelling. But - I'll be back. 🙂
1 9 July 2025, 20:09
 Thomas Haberl - (TH SCALE MODELS)
Missed the start of this one somehow 🙈 great progress so far Michael 👌
1 24 August 2025, 10:58
 Michael Kohl Autore
Welcome my friends. Looks like non-modelling distractions will be less from next week on. So I hope to progress a bit faster then.
2 25 August 2025, 14:32
Michael Kohl AutoreAfter the third time I found more flaws that I sanded and redid only to find another one or the preceding one not yet fixed appropriately I opted for a more general makeover and painted the whole plane in a lighter shade of blue. So, quite a bit of work got into it but looks pretty much the same.
5 September 2025, 09:52
 Mark Sherwood
Your figures, something else. Great progress on the build Michael. 👍🥸🤟
1 5 September 2025, 11:22
bughunterWow, the figures in 1:72! I'd be happy if I could manage that in 1:48.
2 5 September 2025, 12:36
Michael Kohl AutoreThanks folks for you nice feedback. Happy that you like the little guy.
7 September 2025, 12:58

 Michael Kohl Autore
Well, while I tried to drink it into a beauty my mates have benn less easy on it and pointed - rightly I'm afraid - to the color shade as much too light and greyish in appearance. When pondering options to fix this the suggestion came up to apply filters with bright blue. Said - done. Using prussion blue oil color heavily diluted with odorless thinner and VMS quick drying medium for oils I applied 4/5 layers of filter. This really brought life back into the colors. Next will be to blend the fabric areas even a bit more.
And the second figure is mostly done.
12 September 2025, 08:39
Mark SherwoodAnother tour de force on the figure, as Bughunter stated , I wish my 1.48 even my 1.35th looked as good. 👌🥸👍
2 12 September 2025, 11:32
 Michael Kohl Autore
Back on square 1. I was wrecking my brain on how to build the ground work in general and the PSP-area in particular. I couldn't figure out a promising way to lay down the bent mats without them floating in the air when glued on cardboard or soft ground unrealistingly protuding through the holes when put on plaster. So I skipped the idea of individual mats, removed the cardboard from the base and cut the polystyrene PSP-plate from Eduard to shape - not without breaking it in the process. Having finished this I didn't like the way too regular appearance of the board any better. Still struggeling for improvements I finally decided to cut off the bent hooks from the plates, place them on double sided tape on a newly cut Forex plate, drybrush it and fill the gaps n holes with pigments. So, finally I am confident that this might work the way I want it.
Probably it would have been better to finish the base completely and only then to color everything. Hmm, let's see whether I can incorporate my painted stuff in a way to keep the paintwork.
Ok, already beyond square 1 again - and now with a clear vision. My fingers itch to proceed but I probably have to bite my nails for another some two weeks before life permits further significant progress. Stay tuned.
2 13 October 2025, 10:19
Michael Kohl AutoreThanks Lukasz, your crossed fingers are highly appreciated. I am anxious about how the ground work will turn out. I studied quite a few pictures of WW II scenes from the pacific theater and I have quite a clear vision how it should look.
1 28 October 2025, 13:35

 Łukasz Gliński
Now I know who are these odd people collecting worthless leaves, stones and feathers while I walk my dog 😄
1 31 October 2025, 08:39

 Alec K
Excellent indeed Michael. I feel your pain with the ground work, one reason I have not done a complex base in, like, decades 😄
1 31 October 2025, 12:53
Michael Kohl AutoreMakes me happy and smile to read your comments. Nice to have you around.
The cracking of the terrain paste is quite a setback and I used some foul language directed at AK. I never liked the stuff in the first place and thought I could more or less use it up on this project, but it obviously fought back on me.
Any ideas for a remedy are welcome.
3 November 2025, 08:50
Alec KHoly mother of poop! Not sure that's salvageable mate. As to the cause, a very unqualified thought would be: too much liquid. 😫😭
1 3 November 2025, 13:33
Michael Kohl AutoreWell, that thought might not be that unqualified after all as I used water deliberately to achieve a smooth, sandlike surface.
And it will be salvaged for sure as the dozer is connected rock solid with it and I will do my very best and beyond not to discard it.
Stay with me.
1 3 November 2025, 15:08
Alec KAh, well if the dozer can't be moved, salvaged it must be. Filling the voids with the same stuff may work, now that there is not that much of it to shrink. Fingers crossed!
1 4 November 2025, 18:49
 Timmie
Ohw brother. In last resort you can cut out the piece with dozer and paste it in a new base.
1 4 November 2025, 21:08
Mark SherwoodBloody Hell! As above. Or rebuild if you want to go down the hairshirt route. It does remind me of a dried up river bed/ reservoir. Good luck Michael with whatever you do to rectify it.
1 4 November 2025, 21:55
Michael Kohl AutoreThanks mates for your sympathy and advice. Here the actual state of affairs: In a midnight procedure I managed to pry the dozer loose with easily repariable damage (dozer blade disintegrated and severed) with not too much of terrain still stuck to the tracks. I even managed to salvage most of the japanese scrap. Then I stripped all the terrain back to the cardboard level. Then I watched some videos of how to apply the material properly. Then took a deep breath and went to sleep.
So now with a new day dawning I decided on my new old strategy. I will prep up my groundwork base with the same technique as before - but differently (cardboard for shaping the terrain, then Elmer-Glue soaked toiletpaper for the final shape and then I will use the same material again, but this time only for a thin final layer which is only stippled onto the base. This stuff is obviously not meant to be applied in thicker layers. I keep you updated.
4 5 November 2025, 12:11
Michael Kohl Autore@Alec. That was my Plan a for Plan B. But now I will go for Plan b for Plan B. 😉
5 November 2025, 12:28
 Spanjaard
I am sure you will fix it, and on the other hand, you you have a fantastic technique for some dios to be set in the desert or vey dry places.....
5 November 2025, 16:09
Michael Kohl AutoreBack again and kickin. plan c of Plan B. I initially tried my intended approach with cardboard and soaked toiletpaper but that just didn't look right. I then remembered a big block of Das Pronto modelling clay - and then all the problems I encountered with it. So I watched all the videos there are, were and will be and found explainations and techniques to avoid my past failures. So here is stage one of my recovery using Das Pronto. A promising second start I dare say.
To those interested, some Das Pronto clay techniques in a nutshell:
Problem: Das doesn't stick to the surface and falls off when dry.
Solution: wet clay and/or surface and work the clay thoroughly onto it.
Problem: Das sticks to the surface when spread out.
Solution: wait a few minutes till it is dry to the touch. Use a tile, glass or metal surface to roll it out.
Problem: Das is dry.
Solution: wet it. It can be reactivated by simply adding water. Moist the surface of dry Das and you can add more layers/pieces with a propper bond.
Problem: Das cracks when drying
Solution 1: use thin layers. If thicker objects are needed wrap thin Das around a core of i. e. crumbled aluminum foil or pieces of foam or whatever.
Solution 2: prolong drying, i. e. by covering your work with a moist rag. Thus drying is more evenly and less/no cracks are formed.
Tip: have a moist rag at hand to wipe off dry clay from your hands and thus avoid them crumbs to ruin your flat surface
Heeding those advices I achieved what I was aiming for. Maybe it'll help one or two around here too.
4 14 November 2025, 21:43

 Mr D
Mr DWow Michelle, l thought it was the 1:48 when l looked at the extra detail work. Especially the aileron flaps ect. Good move drilling out exhausts, l think they could have added external ones like on the 1:48 at very little expense.
Top job like it 😃👍
1 11 February, 10:49
Michael Kohl AutoreThanks mates for the heads up and encouragement when things slowed down and then gathered momentum again. It is always a boost for motivation.
@Mr. D: it is quite a pity that Tamiyas 72-Corsair doesn't feature the option for flaps down, as the 48-Corsair does. The Aires flaps are a really nice addition here, even if they require a caring hand to blend them in fully.
1 12 February, 08:29
Michael Kohl AutoreProgress on the details. Nav-lights stripped of body paint and painted clear blue and red respectivly, Antennae mounted and radio lines installed (together with die attachment point at the vertical stab). 5 rockets installed. I think I will leave the other three on the ground. Maybe I find a figure I can use to "attach" the rockets to the wing. I was looking for transport carts or trailers, but decided then, that there is not enough room on the dio to make it look good. Wheels prepared for mounting wires. Finally gave the bird a good coat of dust. Seabee figure glued to the Caterpillar.
I have a parachute flying around in my stash. Still pondering to fashion a QAS-harness for it and to put it on the wing. Let´s see. Demasked the cockpit canopy and am left with quite a bit of smear from the liquid mask that did not want to come off with the detergents I tried (dry, water, Isopropanolol, Levelling Thinner). Any suggestions?
4 13 February, 08:17
Mr DDid your horizontal stbs fit correctly ? According to instructions? My one side was way out .....had to sand it down loads.
Have you any references photos for the underside lighting ?
1 13 February, 18:30
Michael Kohl Autore@Mr. D: jep. Them stabs fit just nicely.
No, I just trustef Tamiyas instructions on that point (and I do not care all too much about stuff later invisible. But here is a pic I downloaded.
[img1]
_off_Korea_in_1952.jpg)
It shows a different version and dates from the Korea war but I do not assume that they changed the order of the colors. So, I consider it a decent reference.
@Frank: that's how I started. I assume that the laquer colors change the chemistry of the latex mask, as they are often difficult to rem8ve afterwards. I now I am left with smear and without ideas.
1 13 February, 19:39
bughunterOnce I had to mask a not regular area on a white decal serial number. But this turquoise color from the mask liquid go into the decal, or the clear on top of the decal! I had to sand the top layer away.
Maybe White Spirit (or lighter fuel) can help? It should not attach the paints as we do often a oil paint wash thinned with it. But as often: try on a clear sprue before.
1 13 February, 19:53
Michael Kohl AutoreSounds like a reasonable idea. In the meantime I pryed the canopy off to polish it in and out again. Most likely I will leave it open anyway so that the nice Yahu-details become more visible. Will have to do some touch ups though.
1 13 February, 20:42
Alec KRotten luck with the liquid mask. What brand did you use?
Not sure if you use Future to treat your canopies, but that seems to help with mask removal. I have been able to fix canopy problems, after mask removal, by applying more Future using a find brush.
2 14 February, 14:07
Michael Kohl AutoreI gave it another go with Isoprop which ameliorated matters - only to discover that some paint mist must have found its way onto the inside of the canopy. Hence my decision to pry it off altogether. But the modelling gods have been in a good mood and allowed this to happen without further damage and controllable repairs on the fuselage. In hindsight I even consider it a lucky fail as I like it now much better with the canopy open. So - some touch ups at the cockpit and polishing the canopy and I should be good.
@ Alec: brand is Mr Hobby.
Future and me aren't best buddies. I probably did all the mistakes you can when using Future and most likely added a few more further unknown ones to the inventory. But I like to hide my inability to achieve presentable results by seconding Paul Budzik who considers polished canopies much more realistic than Future-d ones anyway. 😉
3 14 February, 15:37
bughunterI would not try liquid mask on Future due to ammonia in the liquid.
I used Future on my A-10 project and it worked great, but I let it dry for a very long time before masking. I have seen masking sets from Clear Prop with a normal yellow masking paper and there is a warning about masking on Future, so there seems to be a risk.
2 14 February, 15:45
 Bernhard Schrock
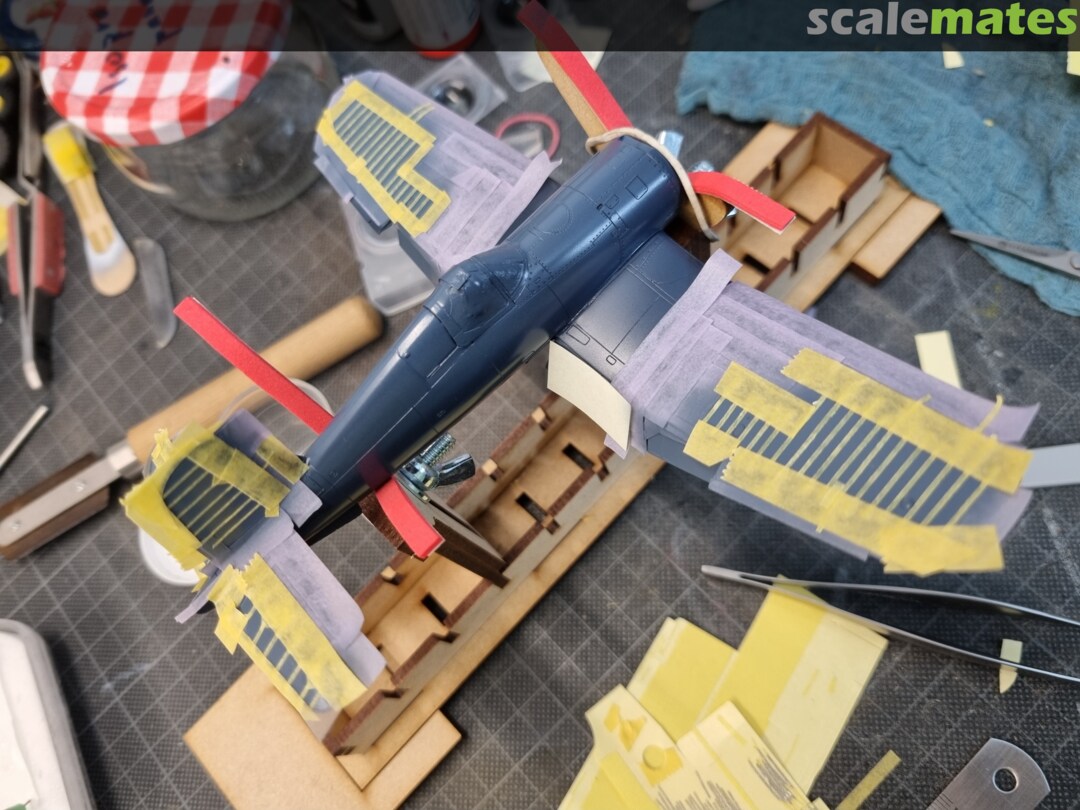
You didn't spare any efforts with the project! For example, masking for different color of the ribs! Palm leaves made of feathers: brilliant.
2 14 February, 16:00
Mr DI had liquid mask really mess up a canopy once...! Had to sand n polish best l could.
Never used since.
1 14 February, 16:57
bughunterThe parachute on the wing 👍
Oh come on, you're pulling our leg – that's definitely not 1:72!
2 15 February, 11:40
Michael Kohl AutoreThanks mates! 🙂
I was looking for a little twist and eyecatcher on this build. So when I searched my figure stash for a mechanic to mount the rockets I stumbled across a parachute from Reedoak I once purchased. It was designated a chute to be attached to a QAS harness. So I looked it up and the idea developed to build that harness. I tried to understand how it is fashioned but am afraid that I didn't fully get it. But with the help of another figure, 0.6mm masking strips and buckles from an Eduard set I slashed something together, painted it buff, weathered it very lightly, imitated seams with brown color pencils and superglued it to the wing with the chute on top. And - hey - I actually like it quite a bit.
2 15 February, 14:50
 CaptGPF
Late to the convo - it I try and avoid future or glass products on canopies wherever possible. If I leave the Tamiya tape on more than a week, it starts leaving residue on the canopy - making it impossible to clean without alcohol - which in turn removes the canopy liquid!
1 20 February, 22:03


