

Bell 47 J, G-ASLR
 1December 14, 2023As warm up I thinned the fuselage in the area of the engine (openings).
 2December 14, 2023
 3December 14, 2023The kit offers two etched parts but unfortunate the grid is not fine enough. I’m not sure which of the several options I will choose.
 4December 15, 2023
 5December 15, 2023
 6December 15, 2023You can clearly see that the engine is well visible through the mesh.
 7December 17, 2023Kit part for the controlstick and collective pitch stick are too thick so I scratched them new.
 8December 17, 2023
 9December 17, 2023
 10December 17, 2023
 11December 18, 2023Instrument Panel - column completed.
 12December 18, 2023
 13December 18, 2023
 14December 18, 2023New research results: on each side should be one opening for the exhaust tube.
 15December 23, 2023Cockpit painted. Anyz knobs in place.
 16December 23, 2023
 17December 23, 2023
 18December 23, 2023
 19December 27, 2023
 20December 27, 2023
 21December 27, 2023
 22December 27, 2023Several pieces of 0,8 x 0,3 mm plastic strips as filler for the step between clear part and fuselage.
 23December 27, 2023Approximately 1 hour later: CA is hardened and seam sanded smooth.
 24December 27, 2023
 25December 27, 2023New hinges for the doors (kits molded on removed during sanding the clear part).
 26December 27, 2023
 27December 31, 2023It seemed to me hardly possible or impossible to install the engine framing corresponding to the construction sheet. Therefore I decided to make it completely new from rod.
 28December 31, 2023The remaining V-shaped strut I will install after installation of the engine.
 29December 31, 2023
 30January 4, 2024
 31January 4, 2024
 32January 4, 2024
 33January 5, 2024It was the correct decision to use narrow yellow decal stripes instead of airbrushing. 🙂
 34January 5, 2024
 35January 7, 2024Carburetor intake and V-shaped strut in place.
 36January 7, 2024Engine installed without trouble and without mess.
 37January 7, 2024Very last piece of both exhaust stacks will be installed from outside.
 38January 7, 2024The shaft to the tail rotor is well visible.
 39January 8, 2024It was easier to bend the bow from wire than clean the plastic part.
 40January 8, 2024Both fuel tanks in place.
 41January 8, 2024Skid and several wires and cables installed.
 42January 8, 2024
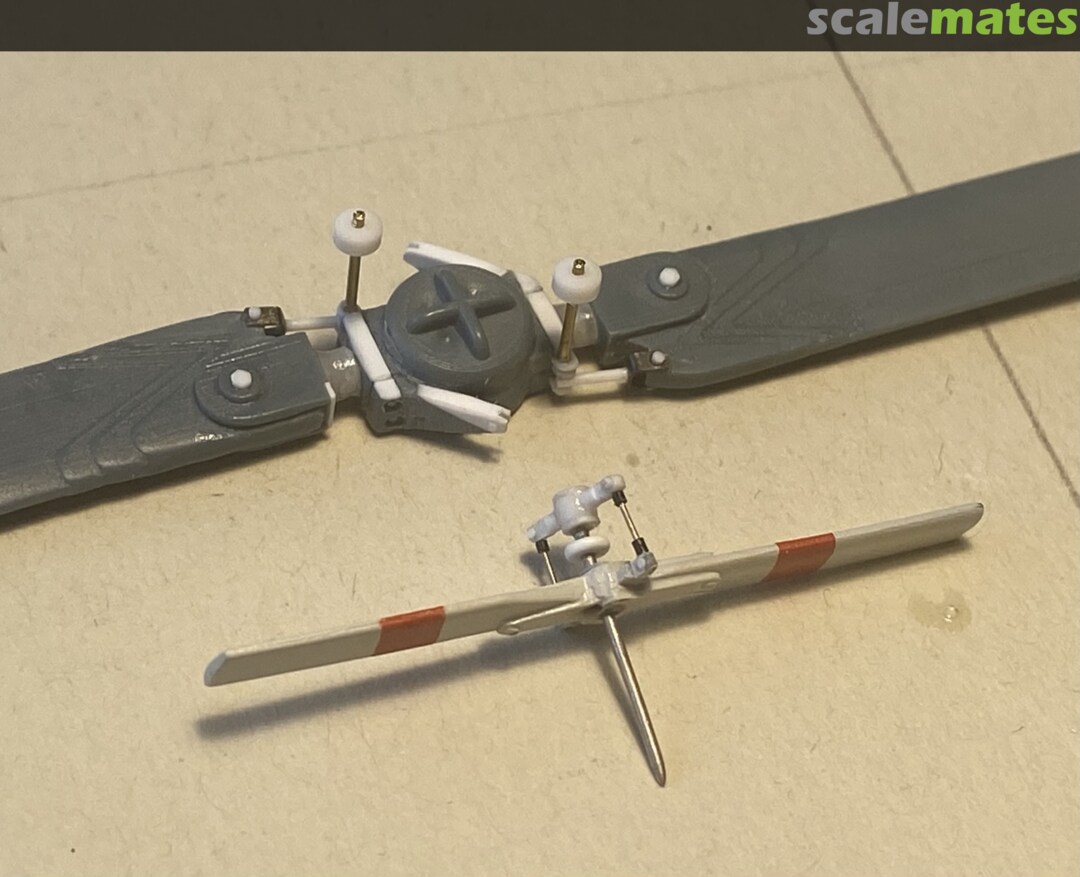
 43January 11, 2024Unfortunately the parts for the main rotor are molded with a lot of flash. So I decided to use only few parts and make the missing rest from scratch.
 44January 11, 2024
 45January 11, 2024
 46January 11, 2024
 47January 11, 2024
 48January 11, 2024
 49January 13, 2024
 50January 13, 2024
 51January 14, 2024
 52January 14, 2024
 53January 14, 2024
 54January 14, 2024
 55January 14, 2024
 56January 14, 2024
 57January 14, 2024
 58January 14, 2024
 59January 14, 2024
 60January 14, 2024
 61January 14, 2024
 62January 14, 2024
 63January 14, 2024


Comments
24 July 2026, 21:40 -

