

Westland Seaking Mk.41 German Navy 89+63 (50 Jahre)
 1March 30, 2024As warm up I modified the HAS/HC instrument panel to a Mk41 panel
 2March 30, 2024
 3March 30, 2024I replaced the molded on rope with wire-rope.
 4March 30, 2024Different position of the antenna mast.
 5April 1, 2024
 6April 1, 2024Baseplates for the sponson flanges. Aprox. 2,2x5,2 mm.
 7April 1, 2024Baseplates in place. Because of kits overlapping panels I used additional halves on the lower side.
 8April 1, 2024Installation of the sponson’s completed. Panel with electrical connections for auxiliary loads. (5 x male and 5 x female).
 9April 1, 2024Distance between fuselage and “wing” about 1,6 mm. „Glacing“ for the light made of transparent Tesa tape. Masking as usual with a piece of Tamiya tape cutted in shape EXTERNALLY.
 10April 3, 2024
 11April 10, 2024
 12April 10, 2024
 13April 10, 2024
 14April 10, 2024
 15April 10, 2024
 16April 11, 2024
 17April 11, 2024
 18April 11, 2024
 19April 12, 2024Reworked connection points for the winch: 3 x flange, 3 x hydraulic and 2 x electric. The flanges have an asymmetrical design: 3 holes for installing on the fuselage and 1 short “raised” bolt in one corner for the strut. The bolt (0,2 mm wire) will be installed later. Very left is the installation flange for the fixed light.
 20April 12, 2024Courtesy Burkhard Domke
 21April 14, 2024Support / mount for the Mk41 winch.
 22April 12, 2024Courtesy Thomas Neuss
 23April 14, 2024
 24April 14, 2024
 25April 14, 2024
 26April 14, 2024
 27April 14, 2024
 28April 15, 2024
 29April 15, 2024Missing rivet rows added (red). Mk41 has an additional antenna on top (green = mount/base).
 30April 17, 2024New research results: the most Westland-built SeaKings has x-shaped doubler between the rear and main fuselage section. German Mk41 don’t have them. One side reworked. Two rectangular mounting plates for the U-shaped antennas in place.
 31April 19, 2024main door: research results.
 32April 19, 2024Mk41 main door about 1 hour and 43 parts later 🙂
 33April 19, 2024
 34April 22, 2024Main door opening detailed & corrected.
 35April 22, 2024Correct positions for the flare dispensers. All 4 will be installed after painting & finishing via wire pieces (0,2 mm).
 36April 22, 2024
 37April 24, 2024
 38April 24, 2024Courtesy Thomas Neuss
 39April 25, 2024Many thanks to TN for his extraordinary original pictures 🙂
 40April 25, 2024
 41April 26, 2024Left side: Hinges added.
 42April 26, 2024Right side: fasteners added.
 43April 25, 2024Right side corrected and detailed minus ventilation panel. SeMa - oval side plate plus several panel covers in place. Electric cable and his 8 fittings will be installed after painting. 8 x 0,25 mm hole is well visible.
 44April 25, 2024Courtesy Thomas Neuss
 45April 27, 2024First round of detailing the front seats. German SeaKings have modified upholstery (wider and thicker). Will be modeled new of ureol as master for duplication.
 46April 27, 2024
 47April 29, 2024Upholstery made of ureol completed & fits.
 48April 29, 2024
 49April 29, 2024Ready for duplication. 🙂
 50April 29, 2024The area behind the left door is an eye catcher… That's why I've made a special effort here🙂
 51April 29, 2024Courtesy Burkhard Domke.
 52April 29, 2024
 53April 29, 2024
 54May 1, 2024Westland built SeaKings have no roof in the left door area. Interior structure and installation are well visible.
 55May 1, 2024Cables (white) will be installed later after painting.
 56May 1, 2024Courtesy Burkhard Domke
 57May 2, 2024All knobs and switches (Anyz Models) will be installed after painting .
 58May 2, 2024Courtesy Thomas Neuss.
 59May 2, 2024
 60May 2, 2024Courtesy Thomas Neuss.
 61May 2, 2024
 62May 4, 2024Westland added electronic control units (computers) for the engines. Both computers were installed in the rack/tunnel located on right side of the cabin. The „influence“ of both engines took via wires. The wires were guided via narrow „channel“ above the right seat to the center console.
 63May 4, 2024Courtesy CW.
 64May 4, 2024
 65May 4, 2024The Seakings are full of surprises, everywhere. Both sides of the cover of the instrument panel have not the same design.
 66May 4, 2024Courtesy Thomas Neuss
 67May 4, 2024
 68May 4, 20245 x lamps as instrument panel illumination.
 69May 5, 2024Informations about the rotor brake are missed… only the lever is installed .
 70May 5, 2024
 71May 5, 2024Extra panel on the upper left (circuit breaker).
 72May 5, 2024Courtesy Burkhard Domke
 73May 6, 2024New research results / informations about the rotor brake (thx CW🙂)
 74May 6, 2024Courtesy CW
 75May 6, 2024On the right side of the upper control panel the SeaKings have the rotor brake.
 76May 6, 2024
 77May 7, 2024Mk41 instrumentpanel
 78May 8, 2024
 79May 7, 2024Courtesy CW
 80May 8, 2024
 81May 8, 2024Completed minus cable trees.
 82May 8, 2024
 83May 10, 2024Have a break? Have a (Kit)cat! 🙂 Bio-Limo in Café „Black Cat“ 🙂
 84May 10, 2024
 85May 10, 2024
 86May 10, 2024
 87May 13, 2024With the Mk41, there are two observers who have their seats at the very back next to the windows. These seats are (unfortunately) different from those in the british (kit) variants. A few pieces of round rod (0,63 mm) help to „improve“ the impression.
 88May 13, 2024
 89May 13, 2024
 90May 15, 2024Six man dinghy 1.0.
 91May 15, 2024
 92May 15, 2024
 93May 17, 2024Six man dinghy 2.0. Yesterday I airbrushed the first coat and was not satisfied with the entire result. Because the (first) part is a little too big, the decision was easy to build a new one. 🙂
 94May 17, 2024
 95May 17, 2024
 96May 17, 2024
 97May 18, 2024Oxygen bottles for the „Beatmungsgerät“.
 98May 18, 2024
 99May 18, 2024Courtesy Thomas Neuss
 100May 18, 2024
 101May 22, 2024
 102May 22, 2024
 103May 22, 2024
 104May 22, 2024Correct blue gray shade of the upholstery.
 105May 22, 2024The color of the upholstery is not corrected yet.
 106May 22, 2024
 107May 23, 2024The standard equipment of an Mk41 includes a "rescue basket" with which injured persons can be taken on board more easily.
 108May 23, 2024Rescue basket in action / „ deployed”.
 109May 23, 2024Rescue basked will be stored on the left side (“Duschkabine” aka working place of the radar operator🙂 ) courtesy Thomas Neuss.
 110May 23, 2024It's been more than 30 years since I have last “woven” something. I was the Pinta of Heller in 1:75...🙂
 111May 25, 2024Working station of the radaroperator.
 112May 25, 2024
 113May 25, 2024
 114May 25, 2024Courtesy Thomas Neuss
 115May 26, 2024New research results: the entire radar console & mounting / rails for the seat is ONE unit. If necessary, a curtain can be pulled down between the two vertical bars. To the right of the right bar is a fairing/upholstery (coming later).
 116May 26, 2024
 117May 26, 2024
 118May 27, 2024Today is 27.5 but it's a bit like Christmas. 🙂 because…
 119May 27, 2024…the package from Jam-Screw is arrived! Thx! I am very excited and curious. 🙂
 120May 27, 2024
 121May 27, 2024
 122May 27, 2024
 123May 27, 2024
 124May 27, 2024Rescue basket. Amazing: Installation on the „shower cabin” took as long as building 🙂
 125May 27, 2024
 126May 28, 2024Result of a “mini-painting & put the parts together task”: the Stryker-Stretcher, which has established itself as a quasi standard in the emergency service.
 127May 28, 2024
 128May 28, 2024
 129May 30, 2024
 130May 30, 2024
 131May 31, 2024Not all parts painted yet.
 132May 31, 2024Upholstery and bag modeled of putty.
 133May 31, 2024Courtesy Thomas Neuss
 134June 1, 2024
 135June 1, 2024
 136June 1, 2024Courtesy Thomas Neuss
 137June 1, 2024„Faces“ for the medical equipment (1200 dpi)
After researching in internet now I know which funktion each of the three devises have: from left Beatmungsgerät, Absauggerät und EKG Monitor/ Defibrillator 138June 1, 2024Medical equipment completed minus paint.
 139June 1, 2024
 140June 1, 2024Courtesy Thomas Neuss
 141June 1, 2024
 142June 2, 2024
 143June 2, 2024
 144June 2, 2024
 145June 2, 2024
 146June 4, 2024Upholstery for the left side completed. Medical equipment minus “Mickymäuse“ (ear protection) in the top middle completed. Beatmungsgerät, EKG-Monitoring/Defibrillator, Injectomat, Box mit 230 V Schukosteckdosen, Absauggerät.
 147June 4, 2024
 148June 6, 2024The filter from Jam-Screw has a huge advantage over the kit: you just have to glue the side tubes and you’re done. When uncovering, I recommend separating the accessible pillars and then twisting the part. In this way, all inner pillars are separated at the same time without damage. All 4 wing nuts are still on. Let’s see how long...🙂
Overall excellent quality! 149June 6, 2024
 150June 8, 2024Today I wanted to do something other than seats, boxes and backpacks and mixed the fire orange (50%RAL3024 und 50% H132).
 151June 8, 2024Correct shade of fire orange: 60% RAL3024 and 40% H132.
 152June 8, 2024The are goods news: The rasterization is no longer visible under the two layers of paint: base coat/pale yellow and fire orange. 🙂
 153June 8, 2024Totally thrilled. Also because of the connection flanges of Jam-Screw. The number of screws and the shape are exactly reproduce!!!
 154June 8, 2024Landing gear in place minus wires and hydraulic.
 155June 13, 2024Jam-Screw parts: 🙂🙂🙂
 156June 13, 2024Jam-Screw: Sandfilter and wheels. Outstanding! 🙂
 157June 13, 2024Take you time for masking.
 158June 8, 2024
 159June 14, 2024Result of a mini modeling task:
Yesterday I kneaded and „backed” (30 min, 130°C) 2 x upholstery and 1 x heating pipe of grey Fimo. Today I added insulation made of Tamiya tape and installed the parts. 160June 14, 2024Upper bar for installing the seat backrest. Lower bar for installing the seats.
 161June 14, 2024Courtesy Thomas Neuss
 162June 16, 2024Current task: 7 seats on the right side. Number of seats courtesy CW🙂🙂 (thx)
 163June 15, 2024Template for upholstery (made of fabric in original) of self adhesive aluminum foil.
 164June 16, 2024Belts will be installed after painting. I intend to use 3D-printed decals for German-Navy by DF-HeloStuff🙂
 165June 16, 2024New research results. The lower horizontal bar is in fact a part of the seat-modules. Because of that I ripped the part of.
 166June 16, 2024Several bags and one suitcase for stowage of the rescue equipment.
 167June 17, 2024The last task on the interior wall / inlay: thickness thinned down because in original its no gap between two layers.
 168June 17, 2024
 169June 18, 2024Labeling for the cabin.
 170June 18, 2024It is amazing what quality a normal printer delivers at 1200 dpi. The font is about 1.3 points and is readable.🙂
 171June 18, 2024It's amazing: you can read the text!🙂
 172June 19, 2024Result of a mini modeling task: five seater and bags with medical equipment. Each bag-group is installed via 2 pieces of 0,4 mm wire.
 173June 23, 2024Rearside bulkhead of the cabin with different rescue equipment.
 174June 26, 2024The last big point for interior components is completed: rack for electronic equipment & foldable seat.
 175June 26, 2024
 176June 26, 2024
 177June 26, 2024
 178June 27, 2024Ready for paint and cables
 179June 27, 2024
 180June 27, 2024
 181June 27, 2024
 182June 27, 2024Picture for the “face”.
 183June 27, 2024Courtesy Thomas Neuss. In fact the “black boxes” are not always black…
 184June 28, 2024
 185June 28, 2024Last elements for the cabin: foot rests for the aft observer seats and a second stretcher. In the original photo you can see that the blanket is on the left (The lettering „BUND“ is inverted🙂)
 186June 28, 2024
 187June 28, 2024New / last research results: the radar compartment (“Duschkabine“) has on the front a blind.
 188June 29, 2024
 189June 29, 2024
 190June 29, 2024
 191June 30, 2024A waterproof green rubber mat is laid on the cabin floor of the SeaKings of the German Navy. However, not under the equipment rack and not in the area of the „shower cabin“ (radaroperator workstation). There, the rubber mat was left out, shortened and folded upwards.
At the points of the mountingpoints and other hatches, access covers (probably also made of rubber) are incorporated into the rubber mat. 192June 30, 2024
 193July 1, 2024Rubber mat and covers & rails painted.
 194July 1, 2024
 195July 1, 2024
 196July 1, 2024
 197July 3, 2024
 198July 3, 2024
 199July 5, 2024Because of the extra upholstery, the sticks are suddenly too short🙁. Therefore, I have weakened the curvature a little.🙂
 200July 5, 2024
 201July 5, 2024
 202July 9, 2024For assembly of the engine housing I recommend to left the parts B1 and B2 loose without gluing for more flexibility during installation of both side panels B11 and B12.
 203July 9, 2024Seamless transition between floor and fuselage.
 204July 10, 2024The fit of Eduards etched part ist excellent.
 205July 10, 2024I used only the outer part of Eduard and reinforced the top edge with 0,4 wire. You can see the reinforcement made of 0,4 mm round rod on the lower side.
 206July 10, 2024Don’t forget to fill the hollows on the inner side bevor removing the “bulbs” on the outside.
 207July 12, 2024Detailing of the underside finished. Compared to the fuselage sides, it was quite simple.
 208July 12, 2024
 209July 12, 2024
 210July 14, 2024Corrected tailrotor shaft tunnel
 211July 14, 2024
 212July 15, 2024
 213July 15, 2024Tunnel and Radome in place. On the lower side I add a narrow stripe of selfadhesive alu foil.
 214July 15, 2024
 215July 15, 2024
 216July 15, 2024New research results: the aft antenna radome is in reality smaller as assumed and is not square but trapezoid. That's why I ripped down the part and made it smaller.
 217July 15, 2024
 218July 20, 2024IMO a optimal base for the fire orange: a mix of yellow and light grey, semi matt
 219July 20, 2024Especially with helicopters with open doors, I wait as long as possible to install the glass parts.
 220July 21, 2024
 221July 21, 2024
 222July 22, 2024Two more airbrush sessions with very dark gray (“black”) later.
 223July 25, 2024
 224July 25, 2024
 225July 25, 2024The last big hurdle in the cockpit: support framing on the inner side of the upper tinted windows.
 226July 25, 2024
 227July 27, 2024The last big hurdle is taken: clear parts for the cockpit in place without mess.
 228July 27, 2024Green: I had to add a 0,13 mm plastic stripe to fill the gap. Red: I had to remove a bit plastic (about 0,2 mm).
 229July 27, 2024
 230July 28, 2024
 231July 30, 2024I have waited four months for this moment. The timeconsuming tasks, the patience and the effort were worth it: I am very satisfied with the result of the cockpit. 🙂
 232July 30, 2024
 233July 30, 2024
 234July 31, 2024
 235July 31, 2024
 236July 31, 2024
 237July 31, 2024
 238August 1, 2024I decided to use only the PE parts for the ladder because the upper door is in original thicker as one PE layer.
 239August 1, 2024
 240August 1, 2024I made the triangles for the „deflection“ of the ropes from wire (for better stability). As attachment to the fuselage i used two pieces of wire. The holes can be seen in the other picture
 241August 10, 2024I have hardly any experience with 3D printed parts, especially concerning the flexibility. The material used by Jam-Screw is quite brittle. Therefore, I decided to disconnect the axles and insert a wire. This also has the advantage that you can align the wheels precisely afterwards, especially because they are flattened.
 242August 10, 2024
 243August 10, 2024
 244August 10, 2024
 245August 17, 2024I wanted to be very „smart“ and install the exhaust pipes from the outside after painting. I overlooked that the opening in the fuselage is much smaller than the „hidden“ end. Therefore, I had to improvise: I sawed off the outer end and inserted them obliquely from the outside.
 246August 17, 2024
 247August 18, 2024As usual I installed the door without glueing via 2 x piece of 0,26 mm wire. I drilled 2 holes (0,24 mm) from outside through the door into the fuselage.
 248August 19, 2024Mooring rope. Almost white.
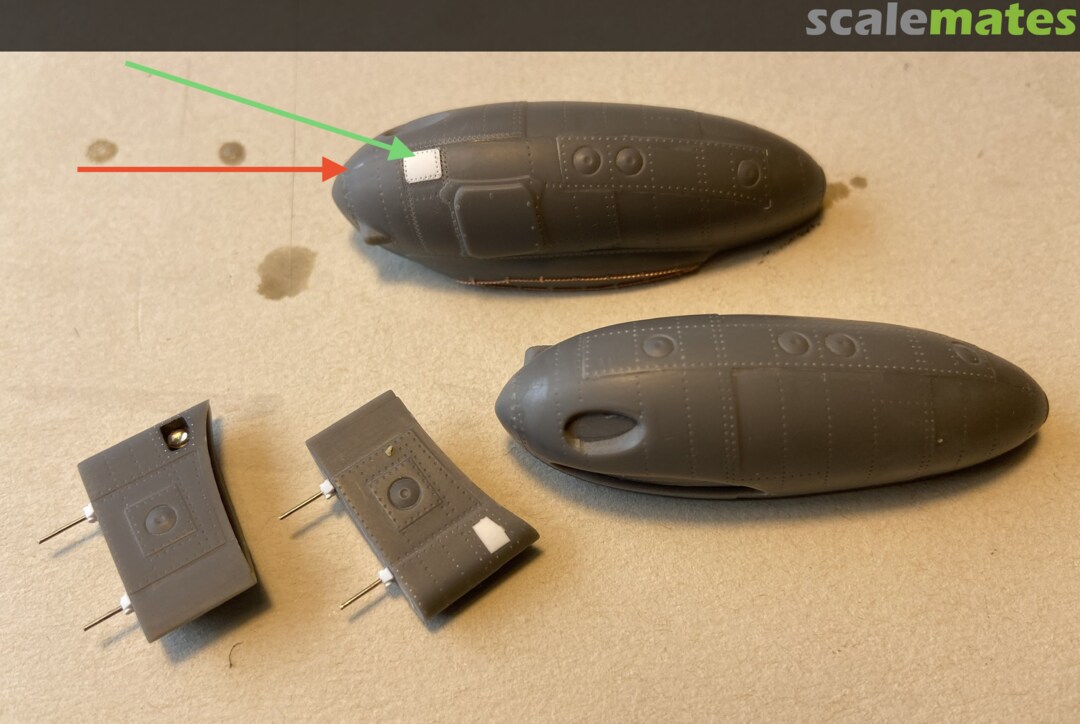
Red arrow: I overlooked that the bulge must be removed and I had to do this on painted model. 249August 22, 2024Today I finished one of the last complex parts for the fuselage. The wiper. What do you think: how many individual parts does a windscreen wiper consist of? 🙂
 250August 22, 2024
 251August 22, 2024Courtesy Burkhard Domke.
 252August 25, 2024Never before have I completed a tailrotor in this quality in such a short time! Thanks to Jam Screw!!!🙂🙂🙂 Compared to the original, all this is great: even the kink at the back edge of the blades is reproduced correctly.
 253August 25, 2024The leading edges are made of self adhesive aluminum foil. The fact that the blades are separated makes it easier to paint the ends in red.
 254August 25, 2024
 255August 30, 2024Courtesy Yellowwing (🙂🙂🙂🙂 )
 256August 30, 2024
 257August 30, 2024
 258August 30, 2024
 259August 31, 2024New research results: connecting cable for the filter exhaust. Pipe for left half of the filter (on the outer side, not present by Jam Screw).
 260August 31, 2024
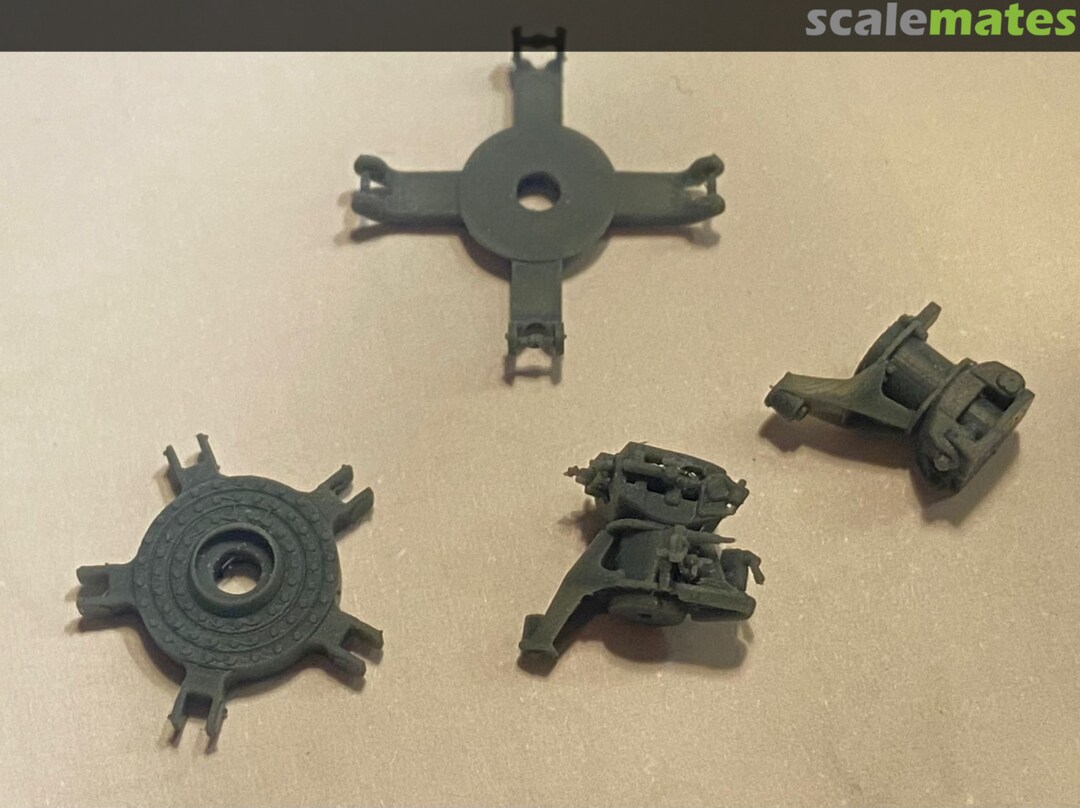
 261August 31, 2024Completed winch.
 262August 31, 2024
 263August 31, 2024
 264September 2, 2024
 265August 31, 2024
 266September 2, 2024Drain with flat lever, made if brass. I could only recognize this detail properly because I was sitting on the ground in front of it.
 267September 2, 2024Connection jack for the intercom on the inner side of the bubble window. You can only see such details if you stand 1/2 m away from it🙂
 268September 22, 2024I got the decals on Friday. Everything except the blue elements is meanwhile in the right place: I'm thrilled! 41 x thank you very much David! 🙂🙂🙂🙂
 269September 22, 2024
 270September 22, 2024
 271September 25, 2024I can read everything and I'm thrilled! Note that date is added in handwriting within the text (as with the original)🙂 THX x 41 David!!!!!!!!
 272September 25, 2024
 273October 7, 2024The big moment is here: the decals are applied and the final assembly can begin!🙂🙂🙂
 274October 7, 2024
 275October 7, 2024
 276October 9, 2024Today I worked on the antenna. This is the result. 🙂
 277October 9, 2024Courtesy Thomas Neuss
 278October 9, 2024Courtesy Burkhard Domke
 279October 9, 2024It is much easier to assemble the complete antenna system including the eyelets, clamping sleeve and insulators outside the model.
 280October 9, 2024
 281October 9, 2024
 282October 10, 2024
 283October 10, 2024
 284October 10, 2024
 285October 17, 2024In the last week I actually managed to instal all the parts without mess, breakdowns and disasters on the fuselage.
Although I am not finished yet (the parts for the rotor have not yet arrived from Australia) I wanted to share some photos of the details with you. ? 286October 17, 2024
 287October 17, 2024
 288October 17, 2024
 289October 17, 2024
 290October 17, 2024
 291October 17, 2024
 292October 17, 2024
 293October 17, 2024
 294October 17, 2024
 295October 17, 2024
 296October 17, 2024
 297October 17, 2024
 298October 17, 2024
 299October 17, 2024
 300December 28, 2024Slowly slowly the rotor head is in sight 🙂🙂🙂 As warm up, I prepared the blades. The end is flat, with a raised „panel“ in the middle on which the staticdiscarger housing is installed.
 301December 28, 2024
 302December 29, 2024Blades painted. Narrow stripes light gray (topside) and dark grey (under side) coming next.
 303December 29, 2024
 304December 29, 2024
 305December 29, 2024„Device“ for painting the light grey strips. Much simpler than applying of 20 pieces of decal.
 306December 29, 202415 minutes later than the last photo. Everything turned out the way I wanted it to be.🙂
 307December 30, 2024
 308February 22, 2025After four months of waiting, the build will be continued with the rotor head von Jam Screw. 🙂
 309February 22, 2025
 310February 22, 2025
 311February 22, 2025
 312February 22, 2025The fit is excellent!🙂🙂 as in the instructions mentioned note the correct order of assembly: first the dampers to the upper star-half, then the lower star-half.
 313February 22, 2025First batch of hydraulic lines BEFORE installing the lower star.
 314February 22, 2025
 315February 22, 2025Fortunately I managed to put all parts together nearly without breaking of the fragile edges. Now ready for laying of cables. Several weeks ago I produced two dozen of T-hydraulic connectors by soldering of tube and wire. This seemed to me the only useable way to produce reasonably stable/durable T-pieces for 0.2 mm wire.🙂
 316February 22, 2025
 317February 23, 2025This is what the intermediate result looks like after a productive modeling day. 🙂
 318February 23, 2025
 319February 23, 2025
 320February 24, 2025After a productive model building day, I am now done with the detailing. Next step: the paintwork in dark gray.
 321February 24, 2025
 322February 24, 2025
 323February 24, 2025
 324February 24, 2025
 325February 25, 2025Thanks to Jam Screw’s pictures (Thx!) I could install the scissors correctly.
 326February 25, 2025If you have an earlier batch/series of the MRH, I recommend making a protruding „installation-point“ for the pitch link on the arm.
 327February 26, 2025Completed minus pitch links. 🙂
 328February 26, 2025
 329February 26, 2025
 330February 26, 2025
 331February 26, 2025
 332February 27, 2025After almost a year, I'm almost done. Honestly, I took a four-month break and waited for Jam Screw's MRH. Tomorrow I just have to mount the star and the axle for the rotor on the fuselage and then I'm really done.🙂🙂🙂
 333February 27, 2025
 334March 1, 2025
 335March 1, 2025
 336March 1, 2025
 337March 1, 2025
 338March 1, 2025
 339March 1, 2025
 340March 1, 2025
 341March 1, 2025
 342March 1, 2025
 343March 1, 2025
 344March 1, 2025
 345March 1, 2025


Comments
24 July 2026, 21:24 -


