

[Revell] VW Type 2 (T2) - WIP


Comments
50 13 June 2024, 16:23
I had some adventures in a microbus with some of my cousins back in the early 70's
27 June 2024, 00:20
Sorry to chip in, MS, but this may help you in the future.
When you remove the chrome, there's a residue underneath. That's sometimes, the reason why there's imperfections in the chrome. The residue is some form of clear coat, that's used before the chrome? That can be removed by soaking in brake fluid, for a while. I've had this issue, mainly with Revell chrome, and it doesn't look great. Sometimes, there's a huge blob, and they just chrome over it. Quality control, needs a kick up the butt, at the factory.
Hope this helps you.
14 August 2024, 21:20
I'm a little late, but from now I will be watching this talent show for sure 🙂
16 August 2024, 06:24
thanks a lot of sharing, now I'm intrigued... what printer do you have you can use a white toner with it???
16 August 2024, 12:12
Liking your 'no problem is insurmountable' attitude, and the results 🙂 Inspiring work for sure 🙂
16 August 2024, 12:22
@Matteo Pescarin - There are printers that can use white custom toner. However, it is not as opaque as the commercial decals, so it honestly falls below my expectations.
What I use is ghost white toner.
At first, I planned to buy an Alps printer, but I had no choice but to give up because it only supported Windows XP.
16 August 2024, 14:07
I did not know about this ghost white, or is a pitty that just one cartridge seems to be about 300Eur, and if you say that the quality is not good enough......
16 August 2024, 21:07
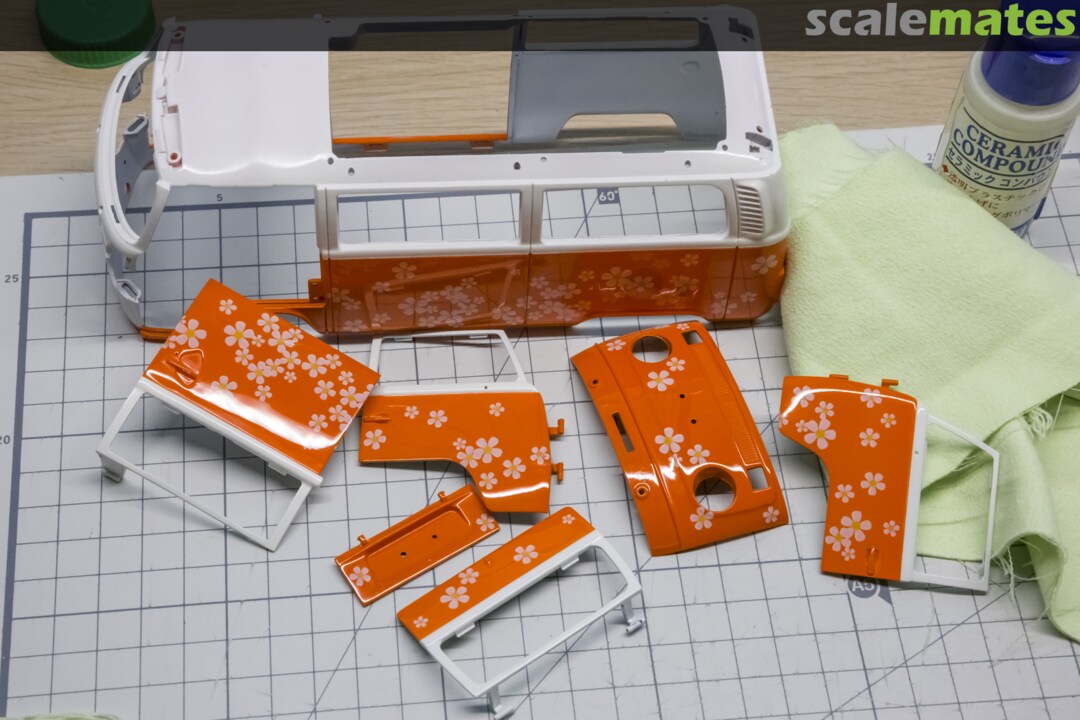
Wonderful work! The Spike decal on the top is a nice little detail.
20 August 2024, 08:16
Album info
FHD images - motorart.tistory.com/777

