

Build Report Millennium Falcon


Comments
269 11 October 2022, 15:17
Hi Jorg, I'm just in the process of getting one of these!...look forward to your build!
22 October 2022, 11:28
Wir ihr sehen könnt bin ich im Moment sehr wankelmütig was mein nächstes Projekt angeht.
Es geht also doch weiter mit dem Falken. 🤦♂️
1 December 2022, 16:09
Schöner Fortschritt, durch die Farben kommt mehr Leben rein, stay on target 😉
25 December 2022, 09:14
Danke Torsten.
Ich werde mit den Filter und Washing Farben noch ein wenig experimentieren um das ganze noch ein bisschen lebendiger zu bekommen. Das kann ich an der Unterseite recht gefahrlos machen, da man die im Diorama kaum sieht.
25 December 2022, 20:37
Was sind das für interessante Halterungen, welche an den Mandibeln sind?
1 January 2023, 11:20
Vielen Dank Männers. 😊
@ Michael
Ich mag unaufgeräumte Arbeitsplätze nicht. Da ist man nur am Suchen.
@Torsten
Das sind selbst gefertigte Aufnahmen für die Mandibeln. So kann ich sie besser anfassen und lackieren. Einfach ein Stück Gewindestange in ein Kunststoff- und Stahlprofil gesteckt und verschraubt.
1 January 2023, 11:54
Sehr schön! Bin auf das Diorama gespannt. Hast du denn den Platz für das fertige Modell schon reserviert?
19 January 2023, 05:43
Danke Chris.
Bei mir kloppen sich die Modelle langsam um die besten Plätze.
19 January 2023, 07:23
You're even building a Diorama for this? Dang. Might need a separate coffee table / display space for this. Looking forward, though, this thing looks great. Recently bought one as well for quite cheap and am looking forward to building it.
19 January 2023, 09:20
Danke Dash.
Da ich sonst Schiffe von über einem Meter Länge baue, kann der hier auf dem Nachttisch Platz nehmen. 🙂
Ja, freu dich drauf, macht echt Spaß den zu bauen.
19 January 2023, 09:51
Oh wow, that diorama idea.... will be... crazy. Really looking forward to that. 😮
2 February 2023, 17:50
This is getting more and more interesting! Looks like a real poorly maintained YT-1300.
2 February 2023, 21:48
Nice that you like it.
True, Han really could have put a little more money into maintaining the Falcon. 😄
3 February 2023, 03:46
Late to the party here, but following along with interest. Great work so far!
10 March 2023, 15:14
Spectacular 👍🏻
Might well be better than the actual film prop - wow - great job and an unending field of details to discover - love the weathering and blaster damage ! 👍🏻
18 March 2023, 14:30
Möge die Macht weiter mit dir sein, Jörg. Bisher sieht der Falke super aus 👍
18 March 2023, 18:15
Jörg, I'm honoured that you thought my little Falcon was a "Sehr schöne Falke", yours is absolut klasse 😊
5 April 2023, 17:40
Bin mal auf das Diorama gespannt, Jörg, aber da wartet mein Falke auch noch drauf..
6 April 2023, 17:09
Und ich erst mal Dietmar.
Mach mir schon einen Kopf wie das Grundgerüst am besten zu realisieren ist.
7 April 2023, 08:04
Stunning. I love the gouge on the underside and the contrast as you flip from the weathered underside to the pristine topside between pic38-39 is a stunning contrast highlighting the work you have put in there. Amazing and inspiring stuff 👍
7 April 2023, 08:11
Guys, your comments are very flattering and mean a lot to me.
7 April 2023, 09:06
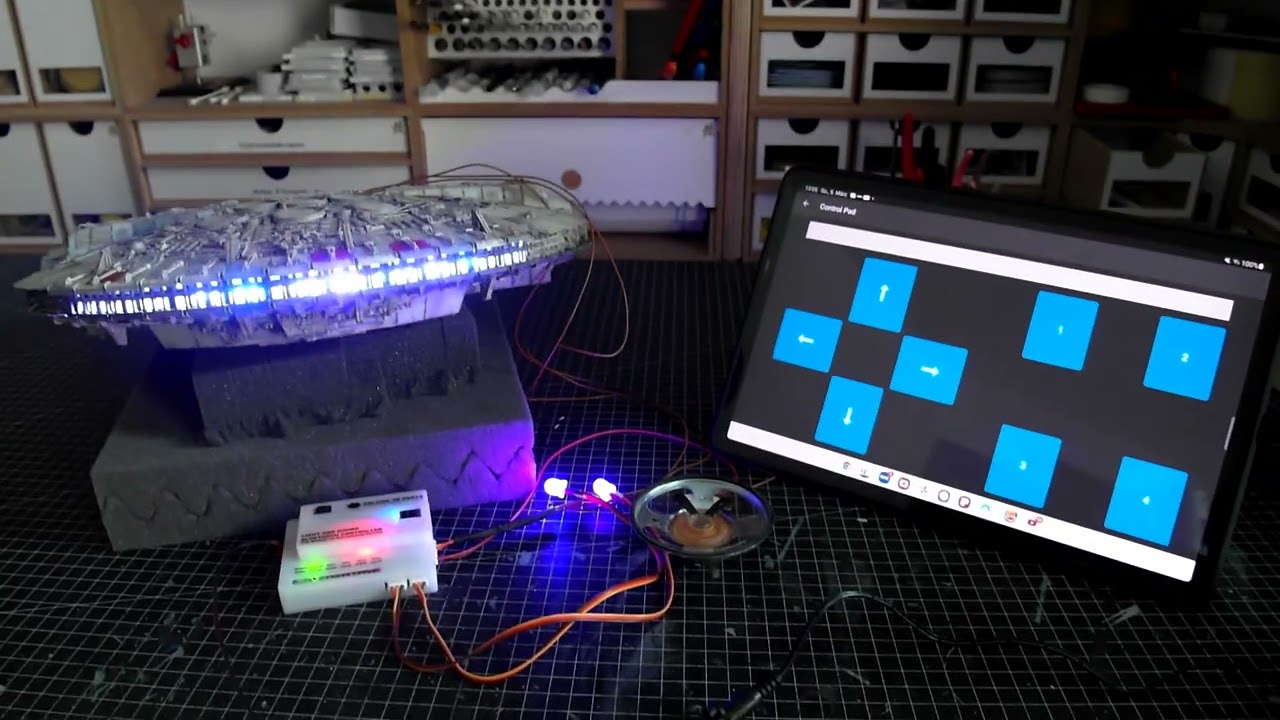
Q: Unsure if OP said anything about this, but are the LEDs linked in a serie, or are there multiple wires for all the LEDs?
11 April 2023, 10:16
Manny thanks..
Two LEDs each are soldered to a cable, since I only had two outputs, Treehugger.
11 April 2023, 15:12
I have yet to fiddle with LED's for my Enterprise NCC-1701 refit, but I did learn from some place that, if one place LEDs in a serie, then if one LED fail, they all fail. So probably best to have serveral wires around instead of one loop for such LED projects.
Another thing to worry about, is not having the LED die too soon, but I guess that might be just some calibration thing if building all this stuff from scratch.
Heh I invested in a digital power supply for LED projects some years back, but haven't gotten around to using it yet.
11 April 2023, 16:31
I'm not particularly worried about the LEDs.
They won't often be glowing in the finished model. Maybe at an exhibition or when there are visitors. A permanent light is therefore not provided. It's just a nice gimmick for me
12 April 2023, 08:02
Lieber Jörg
Wenn ich meinen Falcon gedrucktbhabe und zusammenbaue, müssen wir 2 uns mal kurz schliessen und reden wegen der Bemalung. Die ist ja wieder Mega von dir!!!
Gruss
Jörg
19 April 2023, 18:54
I meant whether the indicated tunnel is made of cardboard. You have made a design to that effect behind the hawk
20 April 2023, 02:57
Yes is part of the diorama framework and is then made of stable PVC
20 April 2023, 05:14
Very cool! The Falcon looks amazing. 👍
This is promises to be a great presentation too.
20 April 2023, 06:16
Jörg, every time I check on your project is it becoming more and more awesome. It just gets better and better every time.
19 May 2023, 17:04
Outstanding work. Simply the best Falcon I've seen. Movie quality work on display here.
26 May 2023, 10:06
Hoffe das Dio wird genaus super wie dein Falke, Jörg, möge die Macht mit dir sein...
7 July 2023, 17:06
Thank you Torsten.
It's easier for me now too.
At the beginning I really thought that I would never get the huge free space filled 😅
13 August 2023, 09:04
This will be so amazing when done. Quick question, are you planning some sort of protective case for it as well? Or will it sit in a display cabinet?
14 August 2023, 16:25
Thank you.
Like my ships, the model will go under a display case.
14 August 2023, 16:47
The base is getting better and better, it could have been used in the movies!
21 September 2023, 07:41
I am absolutely no fan of all this Star Wars, Treck, Shmeck, Heck stuff. But the way you build up layer upon layer of details into a very convincing composition is fun to watch. I am sure that the result will impress even me.
21 September 2023, 09:18
Thank you guys.
Yes Michael, you have to like that. When I was 10, my father took me to see this film and since then I've been into the stuff, along with warships.
And building this Diroama was simply a challenge for me that I enjoy.
21 September 2023, 12:05
are you planning to bring this beauty to Lingen next year? please say yes 🙂
1 November 2023, 09:13
Thank you.
I actually want to try that. I think the last time I was at the EME was in 2014.
If I get the model ready by then, you can count on me. 😉
1 November 2023, 09:51
I am planning to be there, so i hope to have the pleasure meeting you and seeing this amazing dio! 🙂
1 November 2023, 10:48
"Did you fly in that trough? You're braver than I thought!" - Princess Leia
15 November 2023, 10:08
This is astounding! If I recall correctly, kit-bashing is also what has been done on the actual Death Star model that was built for the movie in 1977.
22 November 2023, 13:44
Thank you.
Not only the star, but also the falcon were realized with this system.
The guys from ILM were the creators of all of today's aging and scratching methods that we as model makers know and appreciate.
23 November 2023, 08:58
A lot of grey but it is not boring at all to look at! 👀 👍
This looks great, and is full of details.
1 December 2023, 13:34
Leider kann ich nur ein Like geben, deine Arbeit hätte wahrlich so einige verdient! In jeder Star Wars Ausstellung oder Sammlung sicherlich das Highlight! Fantastisch und vielen Dank für die vielen Bilder!
3 December 2023, 13:22
Es wächst, immer No h ein Detail dazu. Super, bin schon gespannt wie es weitergehen 👀👍👍👍
31 December 2023, 10:46
An amazing build! The Death Star especially! Your dedication, patience, and talent has really been rewarded with this build! Well done!
30 January 2024, 11:44
WOW, this is amazing, absolutely stunning build, cant wait to see it all completed.
30 January 2024, 17:22
Awesome, indescribably fantastic. An appropriate base for the falcon. I'm looking forward to the illuminated finale. 👍👍👍👍👍
30 January 2024, 19:10
truly speechless, this build is one of the best I have seen here, the falcon is magnificent, and with the most incredible base you have made, well, it is just perfect!!
so, it is finished in time for Lingen 2024, right? if all goes to plan, I certainly will look for it there 🙂
4 February 2024, 16:53
Thank you very much people.
Yes Spanjaard, nothing should stand in the way of that. It would be really great if we met there and chatted a little.
5 February 2024, 15:09
ZORIONAK! (congratulations in basque language) GREAT JOB !!!
5 February 2024, 15:17
This is one of the best models I've ever seen! It could go head to head with the real models used during the filming of Star Wars.
7 February 2024, 03:46
Thank you for sharing your build process with us - your work is truly amazing and inspirational!
11 February 2024, 16:34
great to see this beauty again, safe trip to Lingen, great success ahead, I am sure. killing myself for not being able to be there to see it myself....
1 10 March 2025, 09:02
All my best wishes to you for the competition ahead but, most important, to your wife.
1 10 March 2025, 09:39
Great to see this masterpiece again! I wish you lots of fun and success in Lingen - I have to go there too, especially when I see how many of us will be there.
But above all: all the best to your wife!
1 10 March 2025, 10:28
Thank you for being happy for my wife. That's so nice to hear. ❤️
And thank you all very much for keeping your fingers crossed. I'm very excited.
It's such a shame that we won't be able to meet there Spanjaard
1 10 March 2025, 12:27
I will echo the above comments, best wishes, and good luck ( I don't think you will need it) with the competition, but most importantly, happy thoughts to your wife. I am glad to hear that she is doing well.
2 10 March 2025, 17:22
This looks superb Jörg! A really fantastic job. You must be so pleased with this. Im not ready to start mine yet but I intend to build a bespoke coffee table to fit it in. It will be a diorama of the Mos Eisley space port and have a glass top. More importantly I'm glad to hear your wife is doing well. Life is precious.
2 11 March 2025, 16:28
Thank you for your appreciation of my model and my wife's health. ❤️
This sounds like a fantastic project, and I hope to see your space port posted here as a build report someday.
1 12 March 2025, 03:49
Congratualtions Jörg, fully deserved. That medal really should be much bigger for such an awesome model 🥇🥇🥇🥇🥇
1 31 March 2025, 07:08
glad for the safe return, congratulations on a very well deserved medal!
1 31 March 2025, 07:09
Thank you all three very much.. Haha Gareth, then I wouldn't even know where to place them on the model. 😁
1 31 March 2025, 07:47
My warmest congratulations too - a very well-deserved award! 👍👍👍
2 31 March 2025, 07:50
First. I'm glad the people around you are okay.
Second. Congratulations on the medal!
1 31 March 2025, 10:52
Very kind of you two. I'm very happy about it.
And thank you so much for thinking of my family, Живко Джаков. 😊
31 March 2025, 10:56
Seeing it a Lingen i was even more impressed, it's a "great" model with a well deserved medal
1 31 March 2025, 18:56
And thank you both very much for the congratulations. 😊
Nice that you could see him live, Jan.
1 April 2025, 02:22
Congrats Jorg!! Well deserved award for sure! One of the best models/dioramas I've ever seen!
1 1 April 2025, 13:29
Jörg, if this is affecting your mental health, you should think about making such good models. 😁
1 1 April 2025, 14:06
Congrats, mate 👍
This model would also have won in a higher category!
2 2 April 2025, 07:02
Thanks, Bug.
Yes, unfortunately, that was my mistake. I chose the wrong category. Unfortunately, I couldn't change it on-site, even though I asked for it.
2 April 2025, 12:50


